Create Your First Competition
In this tutorial, we will create a complete competition on WODsmith. By the end, you will have a live competition page with divisions configured, events added, and registration open to athletes.
What We'll Accomplish
- Create a competition
- Configure divisions
- Add workout events
- Set up pricing
- Publish and share
This process takes about 15-20 minutes. Let's begin!
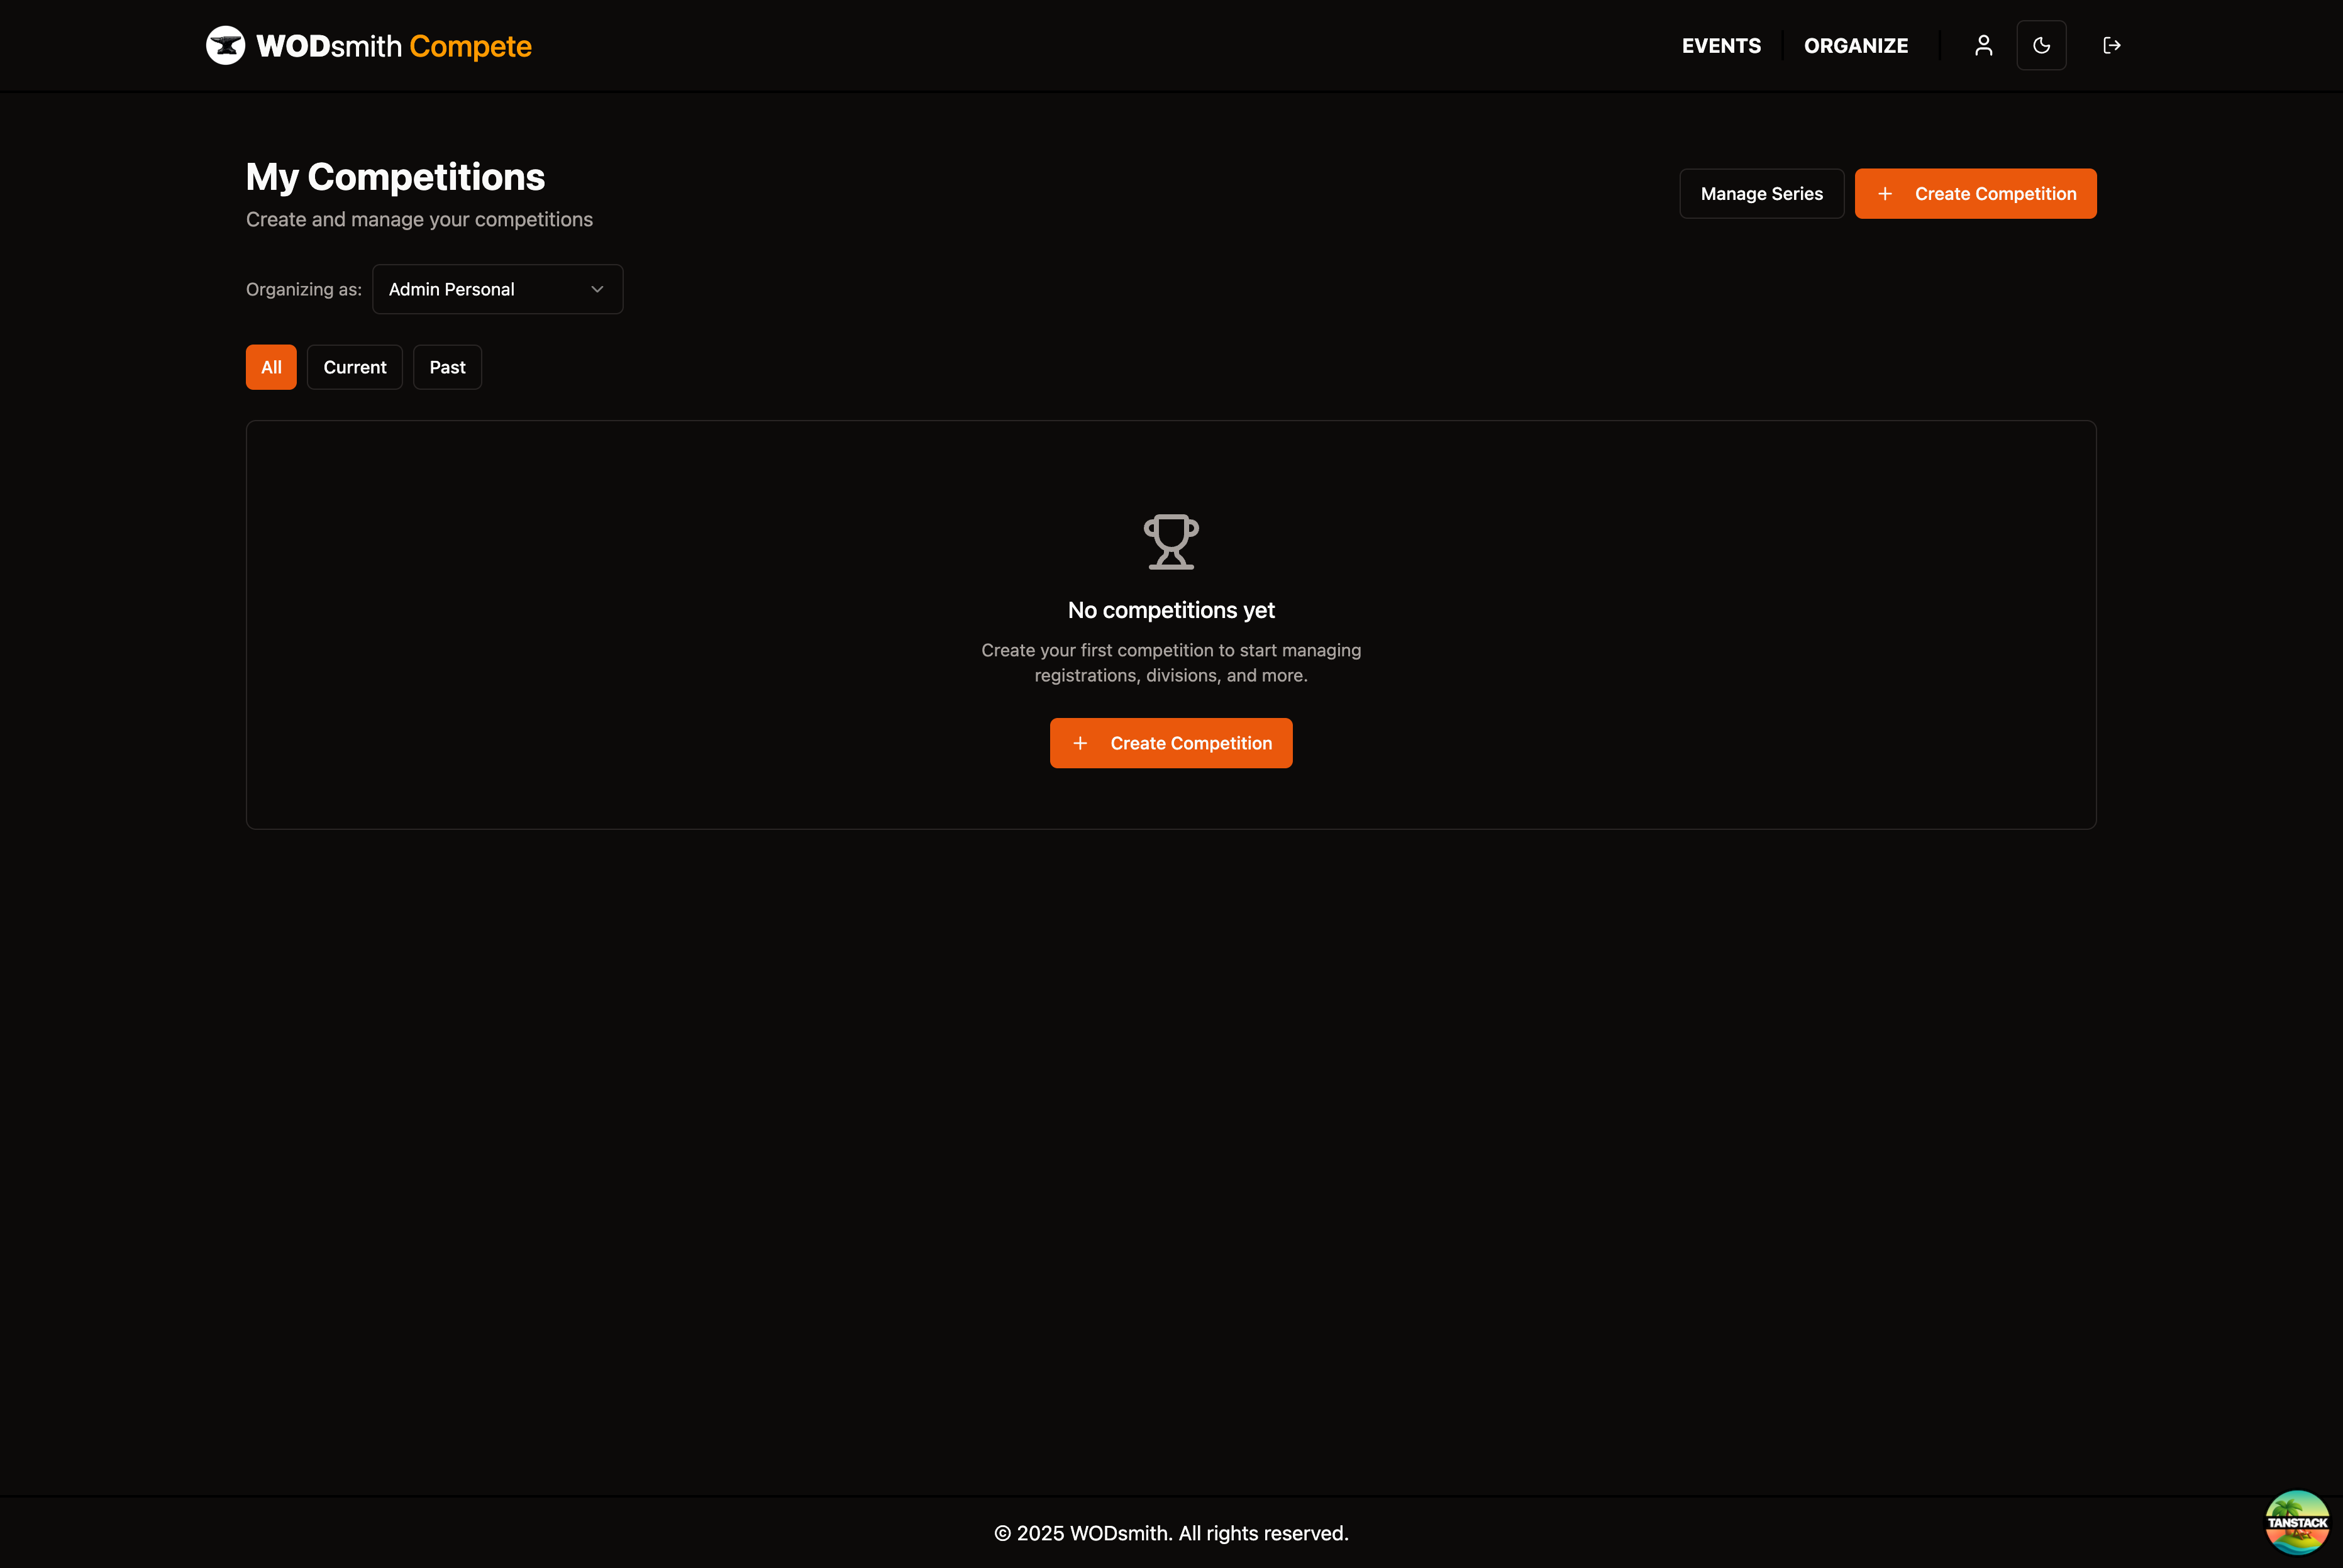
Step 1: Create the Competition
First, we'll create the competition and set the basic details.
- Click COMPETE in the top navigation
- Click ORGANIZE to access your organizer dashboard
- Click Create Competition
- Fill in the competition details:
- Organizing Team: Select your team from the dropdown
- Competition Name: Enter a name (e.g., "Spring Throwdown 2025")
- Slug: A URL-friendly identifier will be auto-generated, or customize it
- Start Date and End Date: Set your competition dates
- Registration Opens/Closes (Optional): Set when athletes can register
- Description (Optional): Add details about your competition
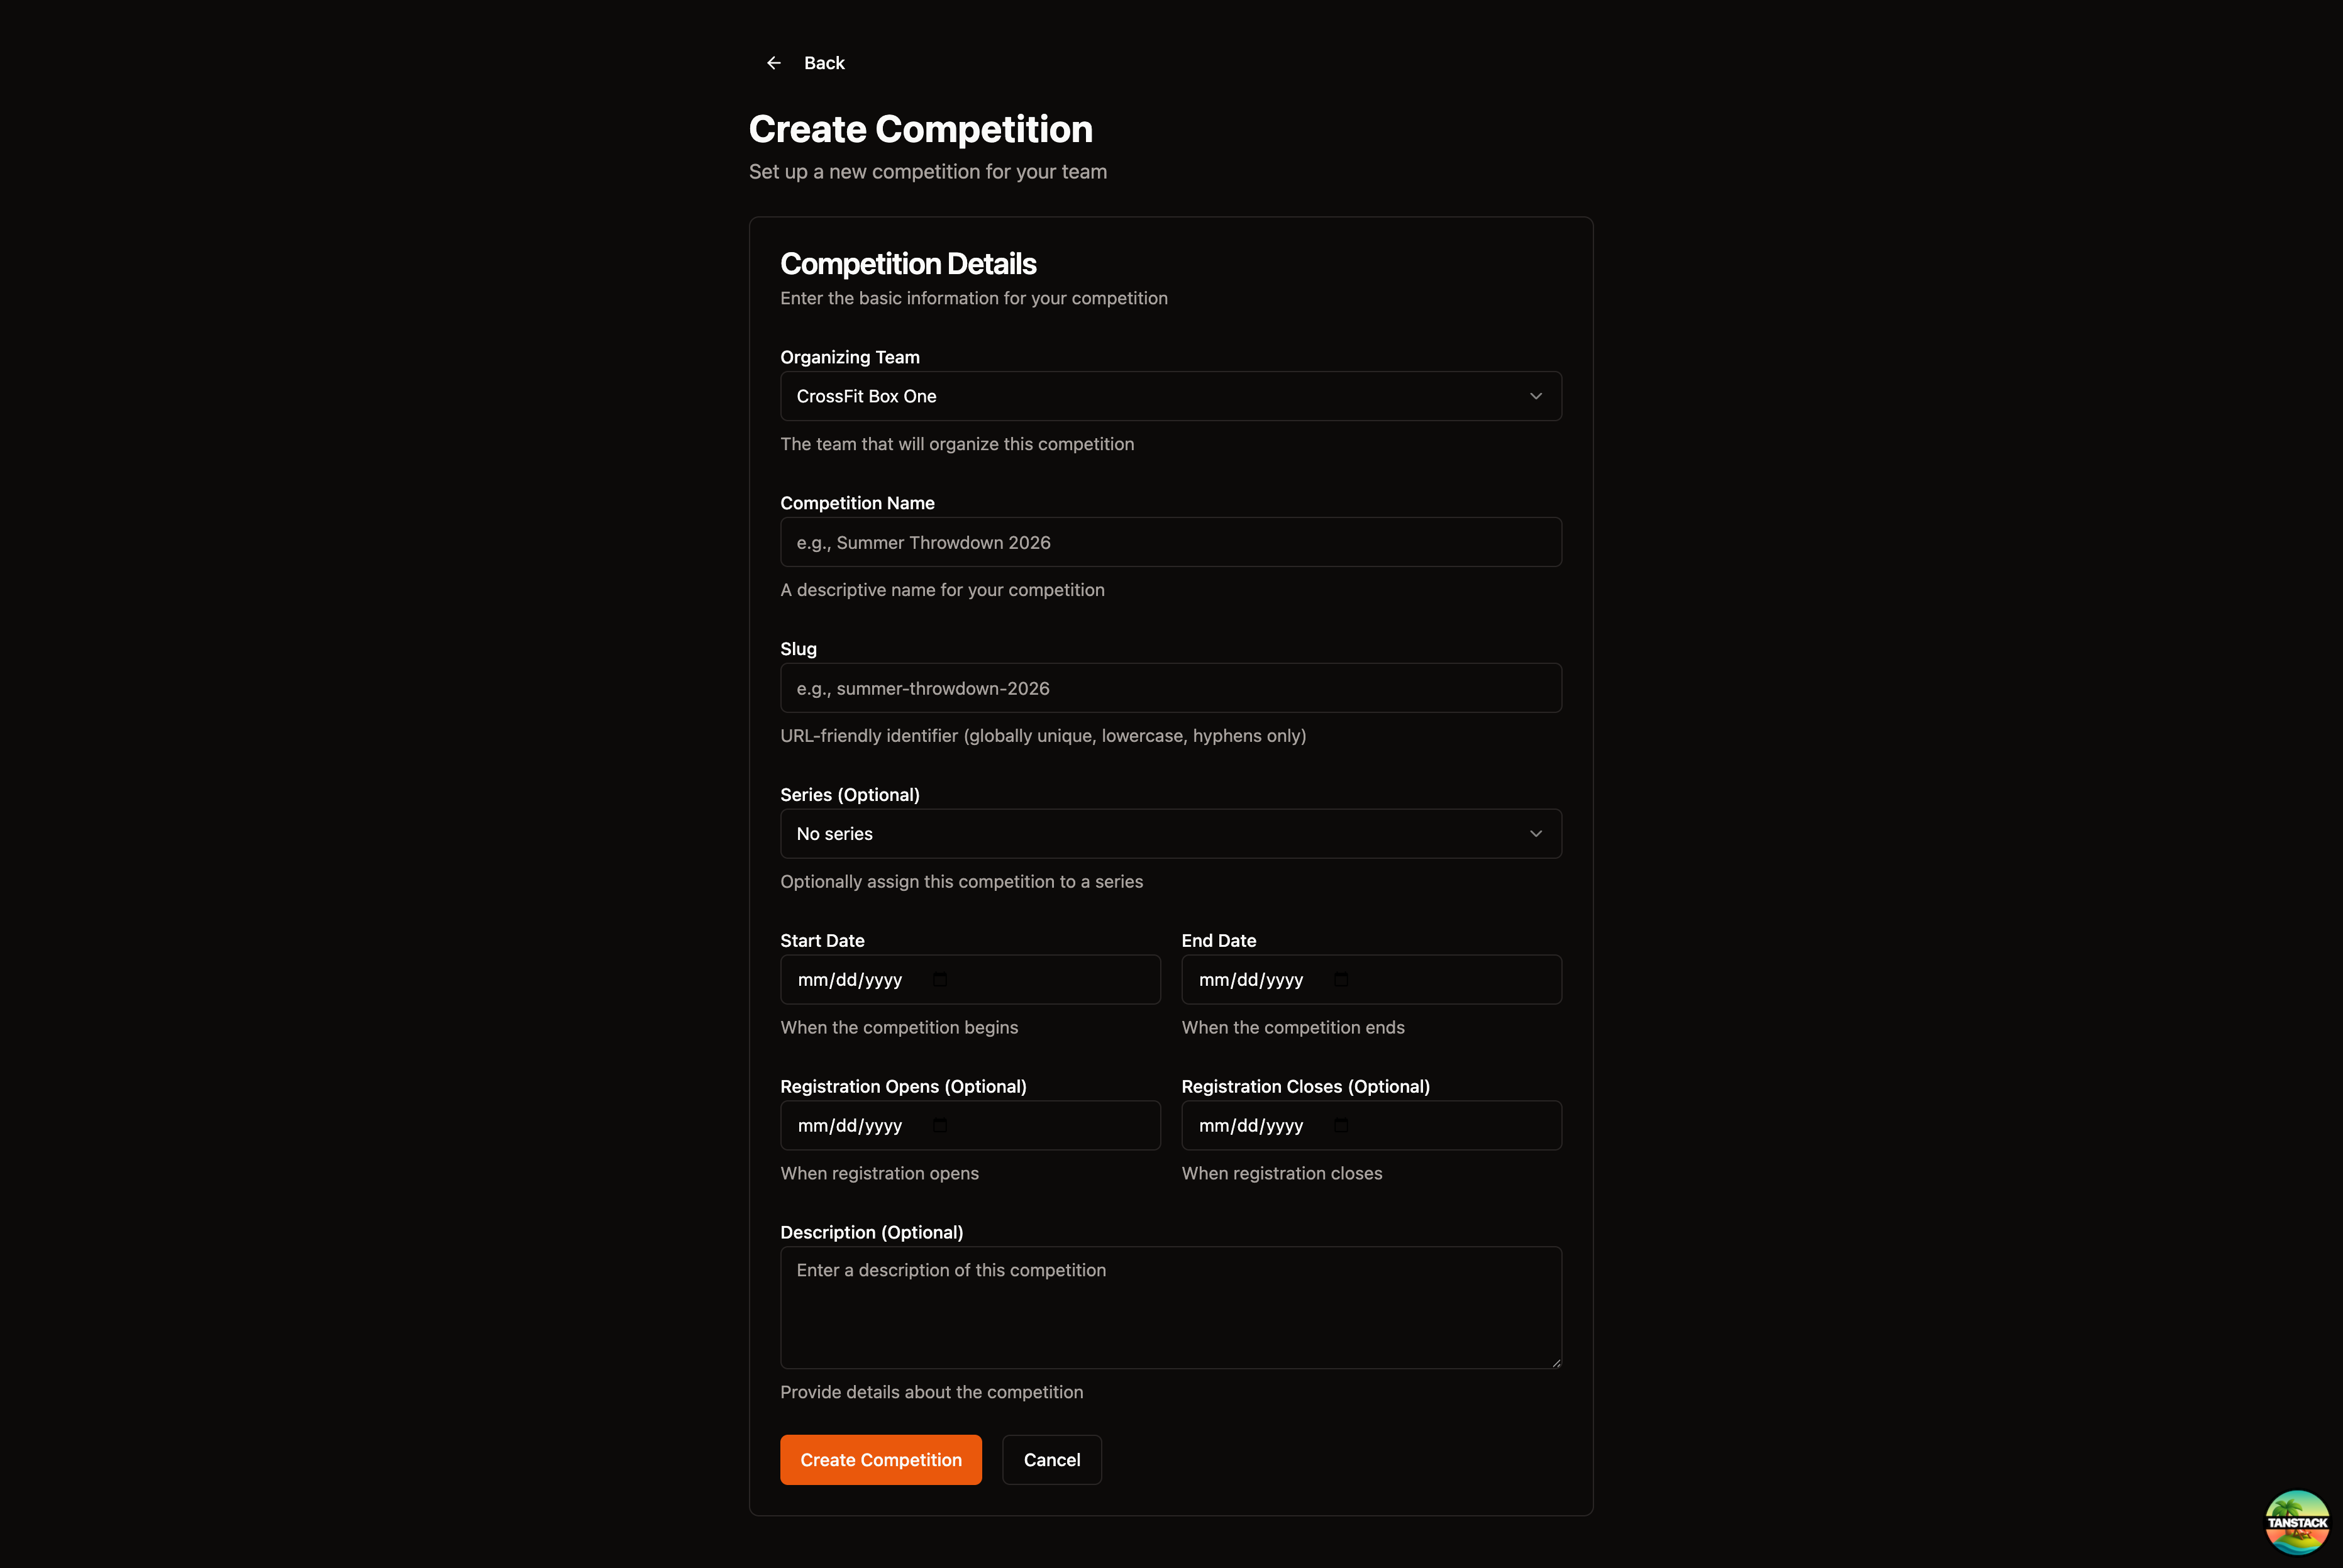
- Click Create Competition
You should see your competition dashboard. This is your control center for managing the event.
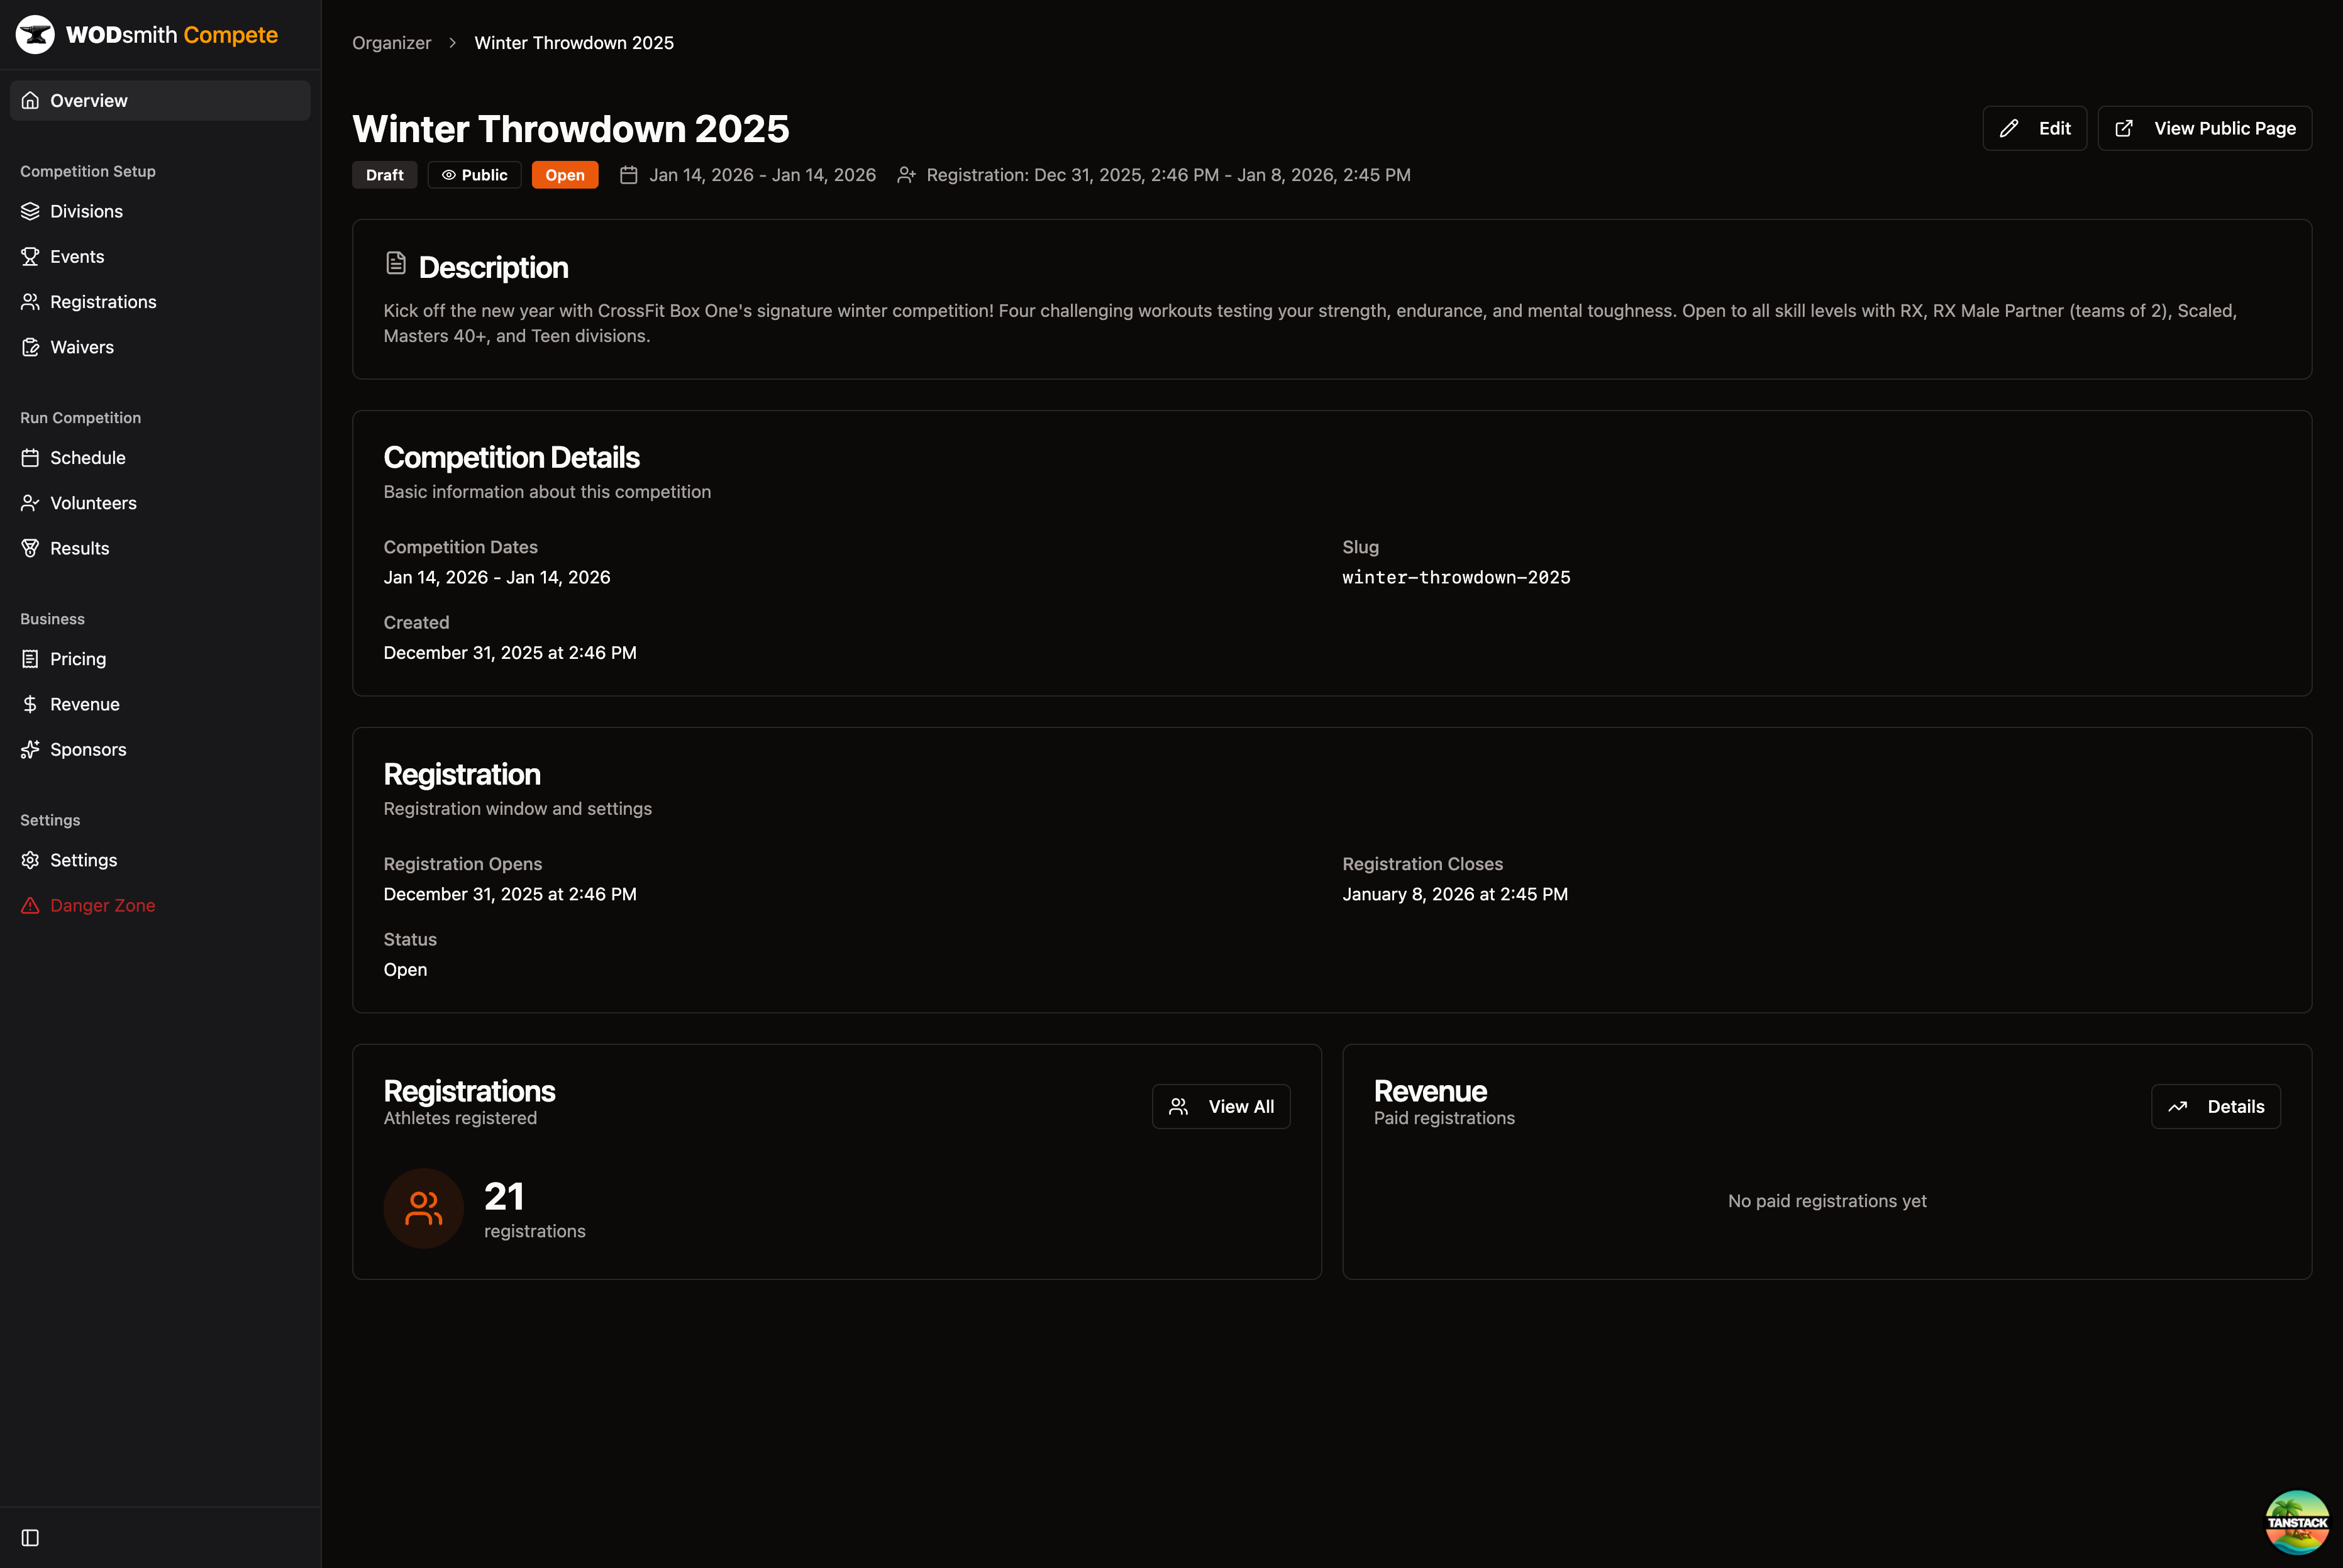
Step 2: Configure Divisions
Now we'll set up the divisions athletes can register for.
- Click Divisions in the left sidebar
- Click Add Division
- Enter "RX" as the division name
- Optionally expand the division to add a description
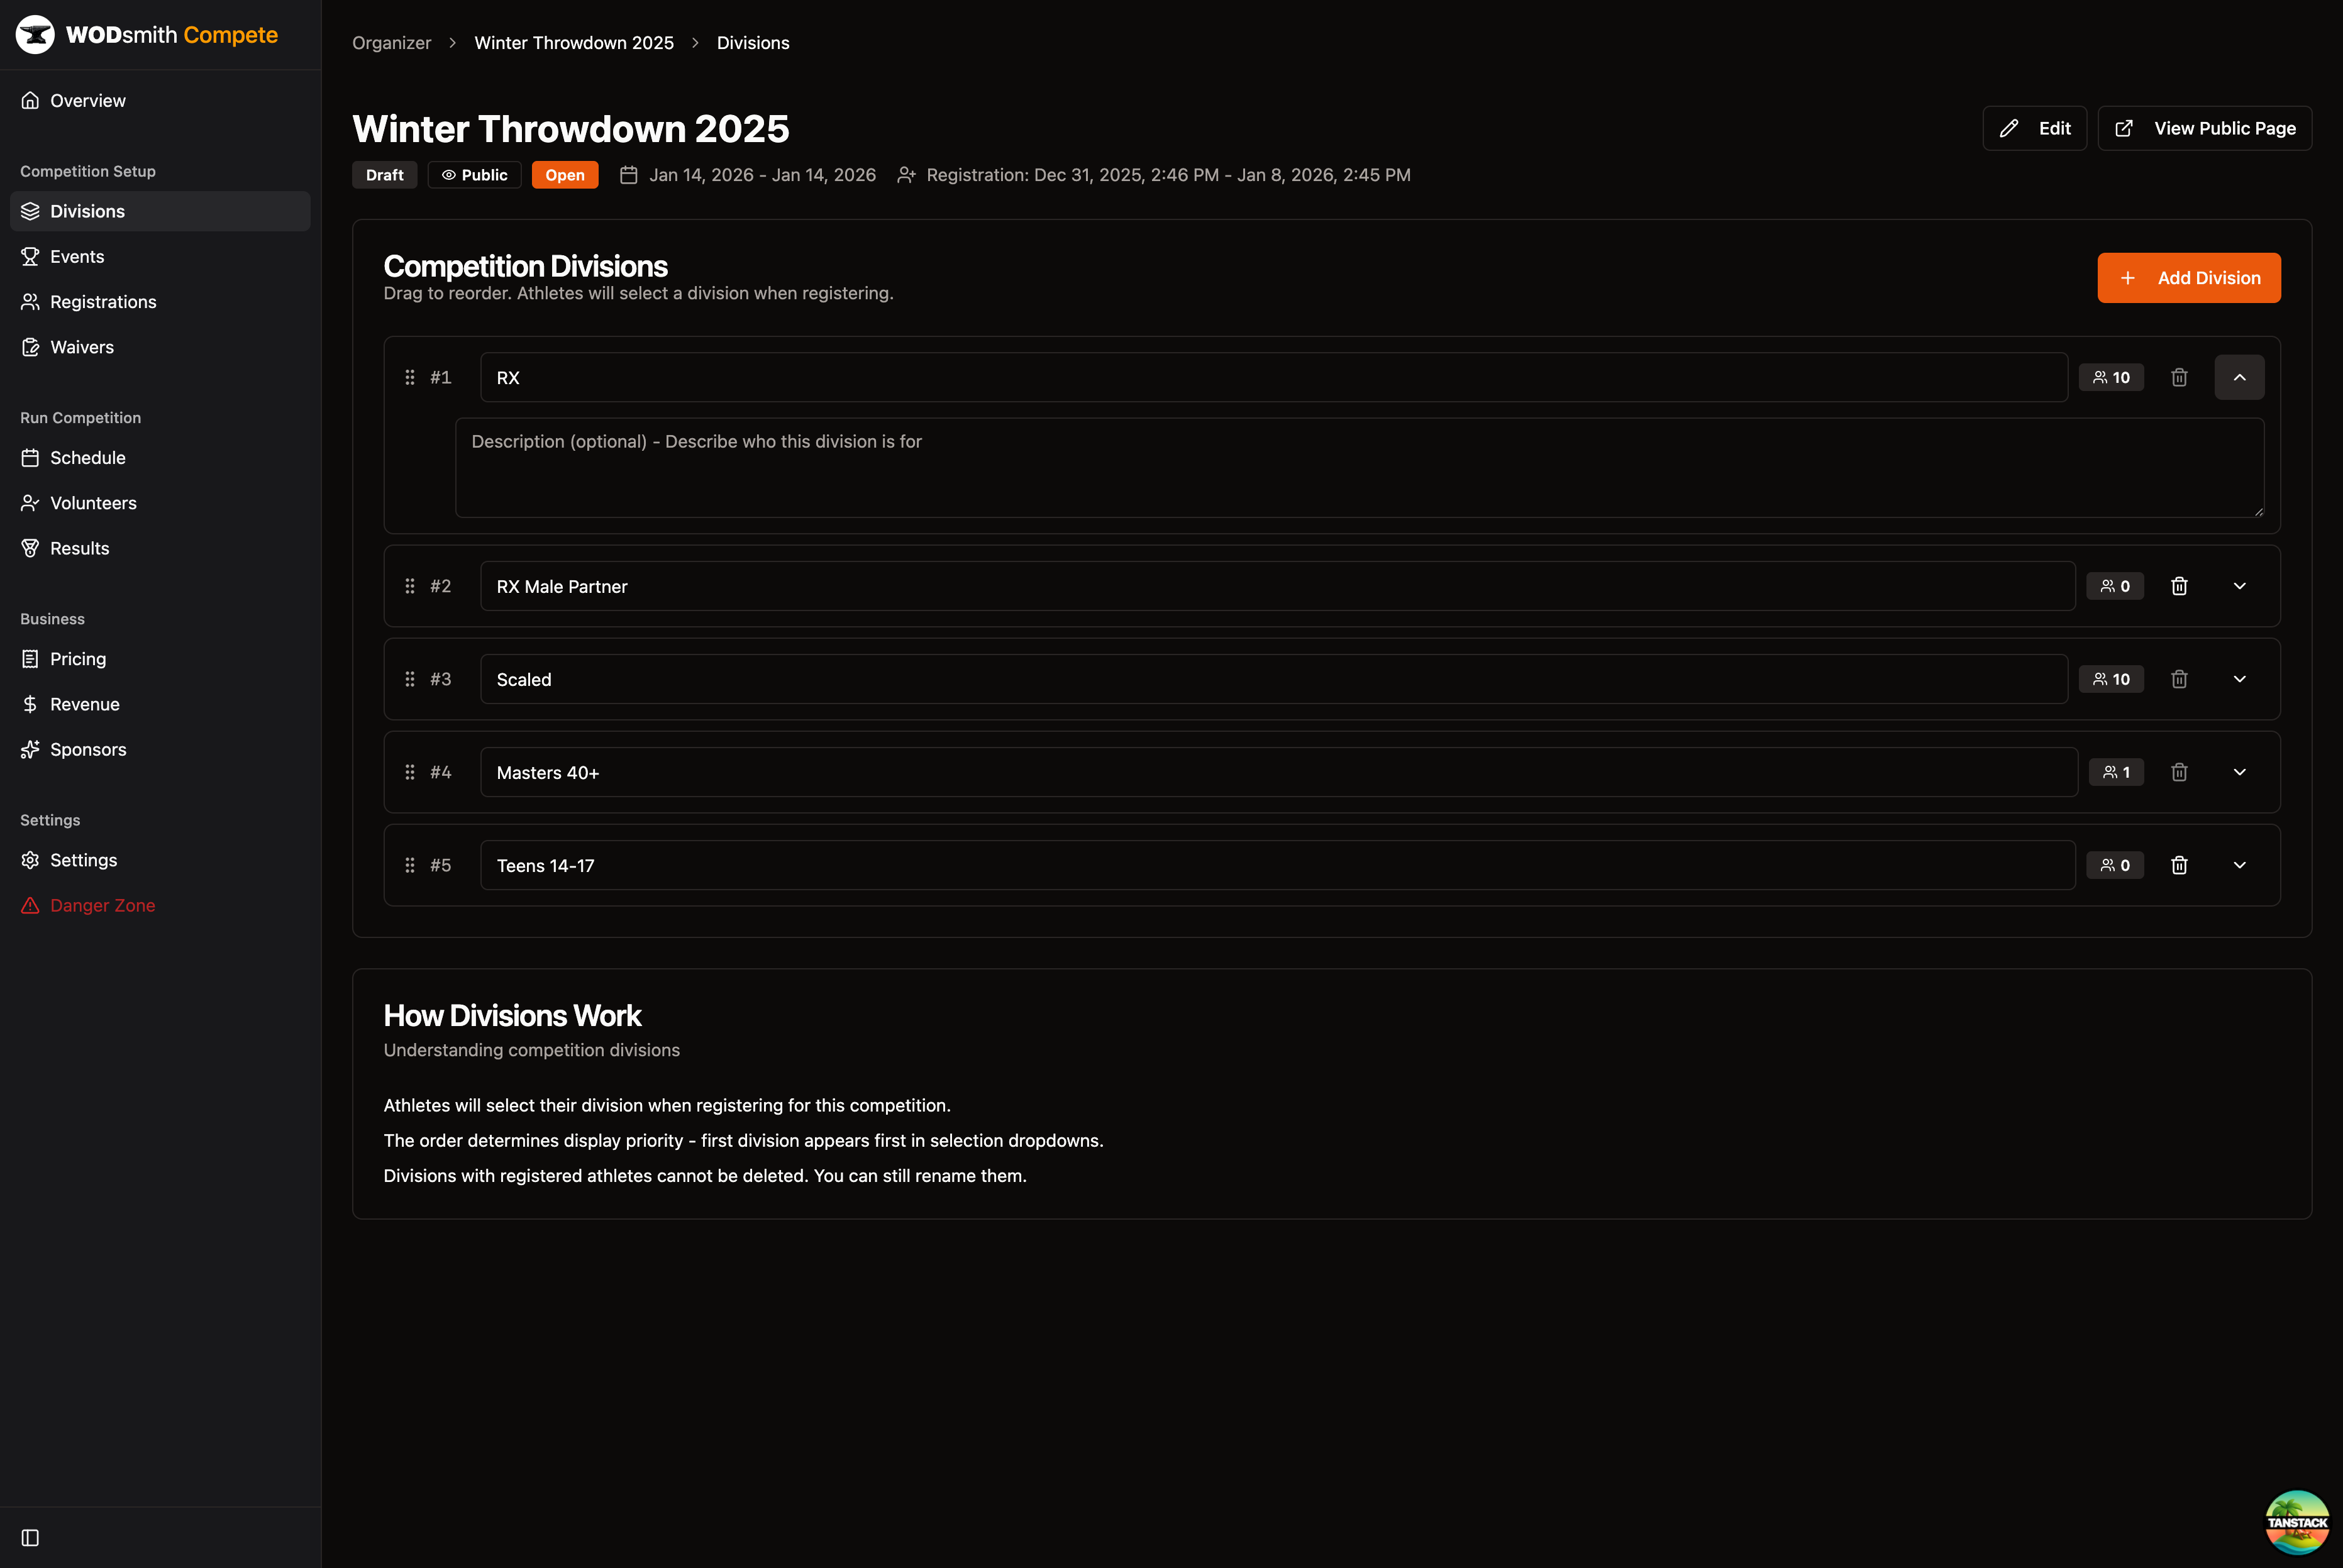
Notice the division appears in your list with a count of registered athletes.
Add More Divisions
Let's add the remaining standard divisions:
- Click Add Division again
- Create divisions for your competition:
- RX
- Scaled
- Masters 40+
- Teens 14-17
You can drag divisions to reorder them. The first division will appear first in registration dropdowns.
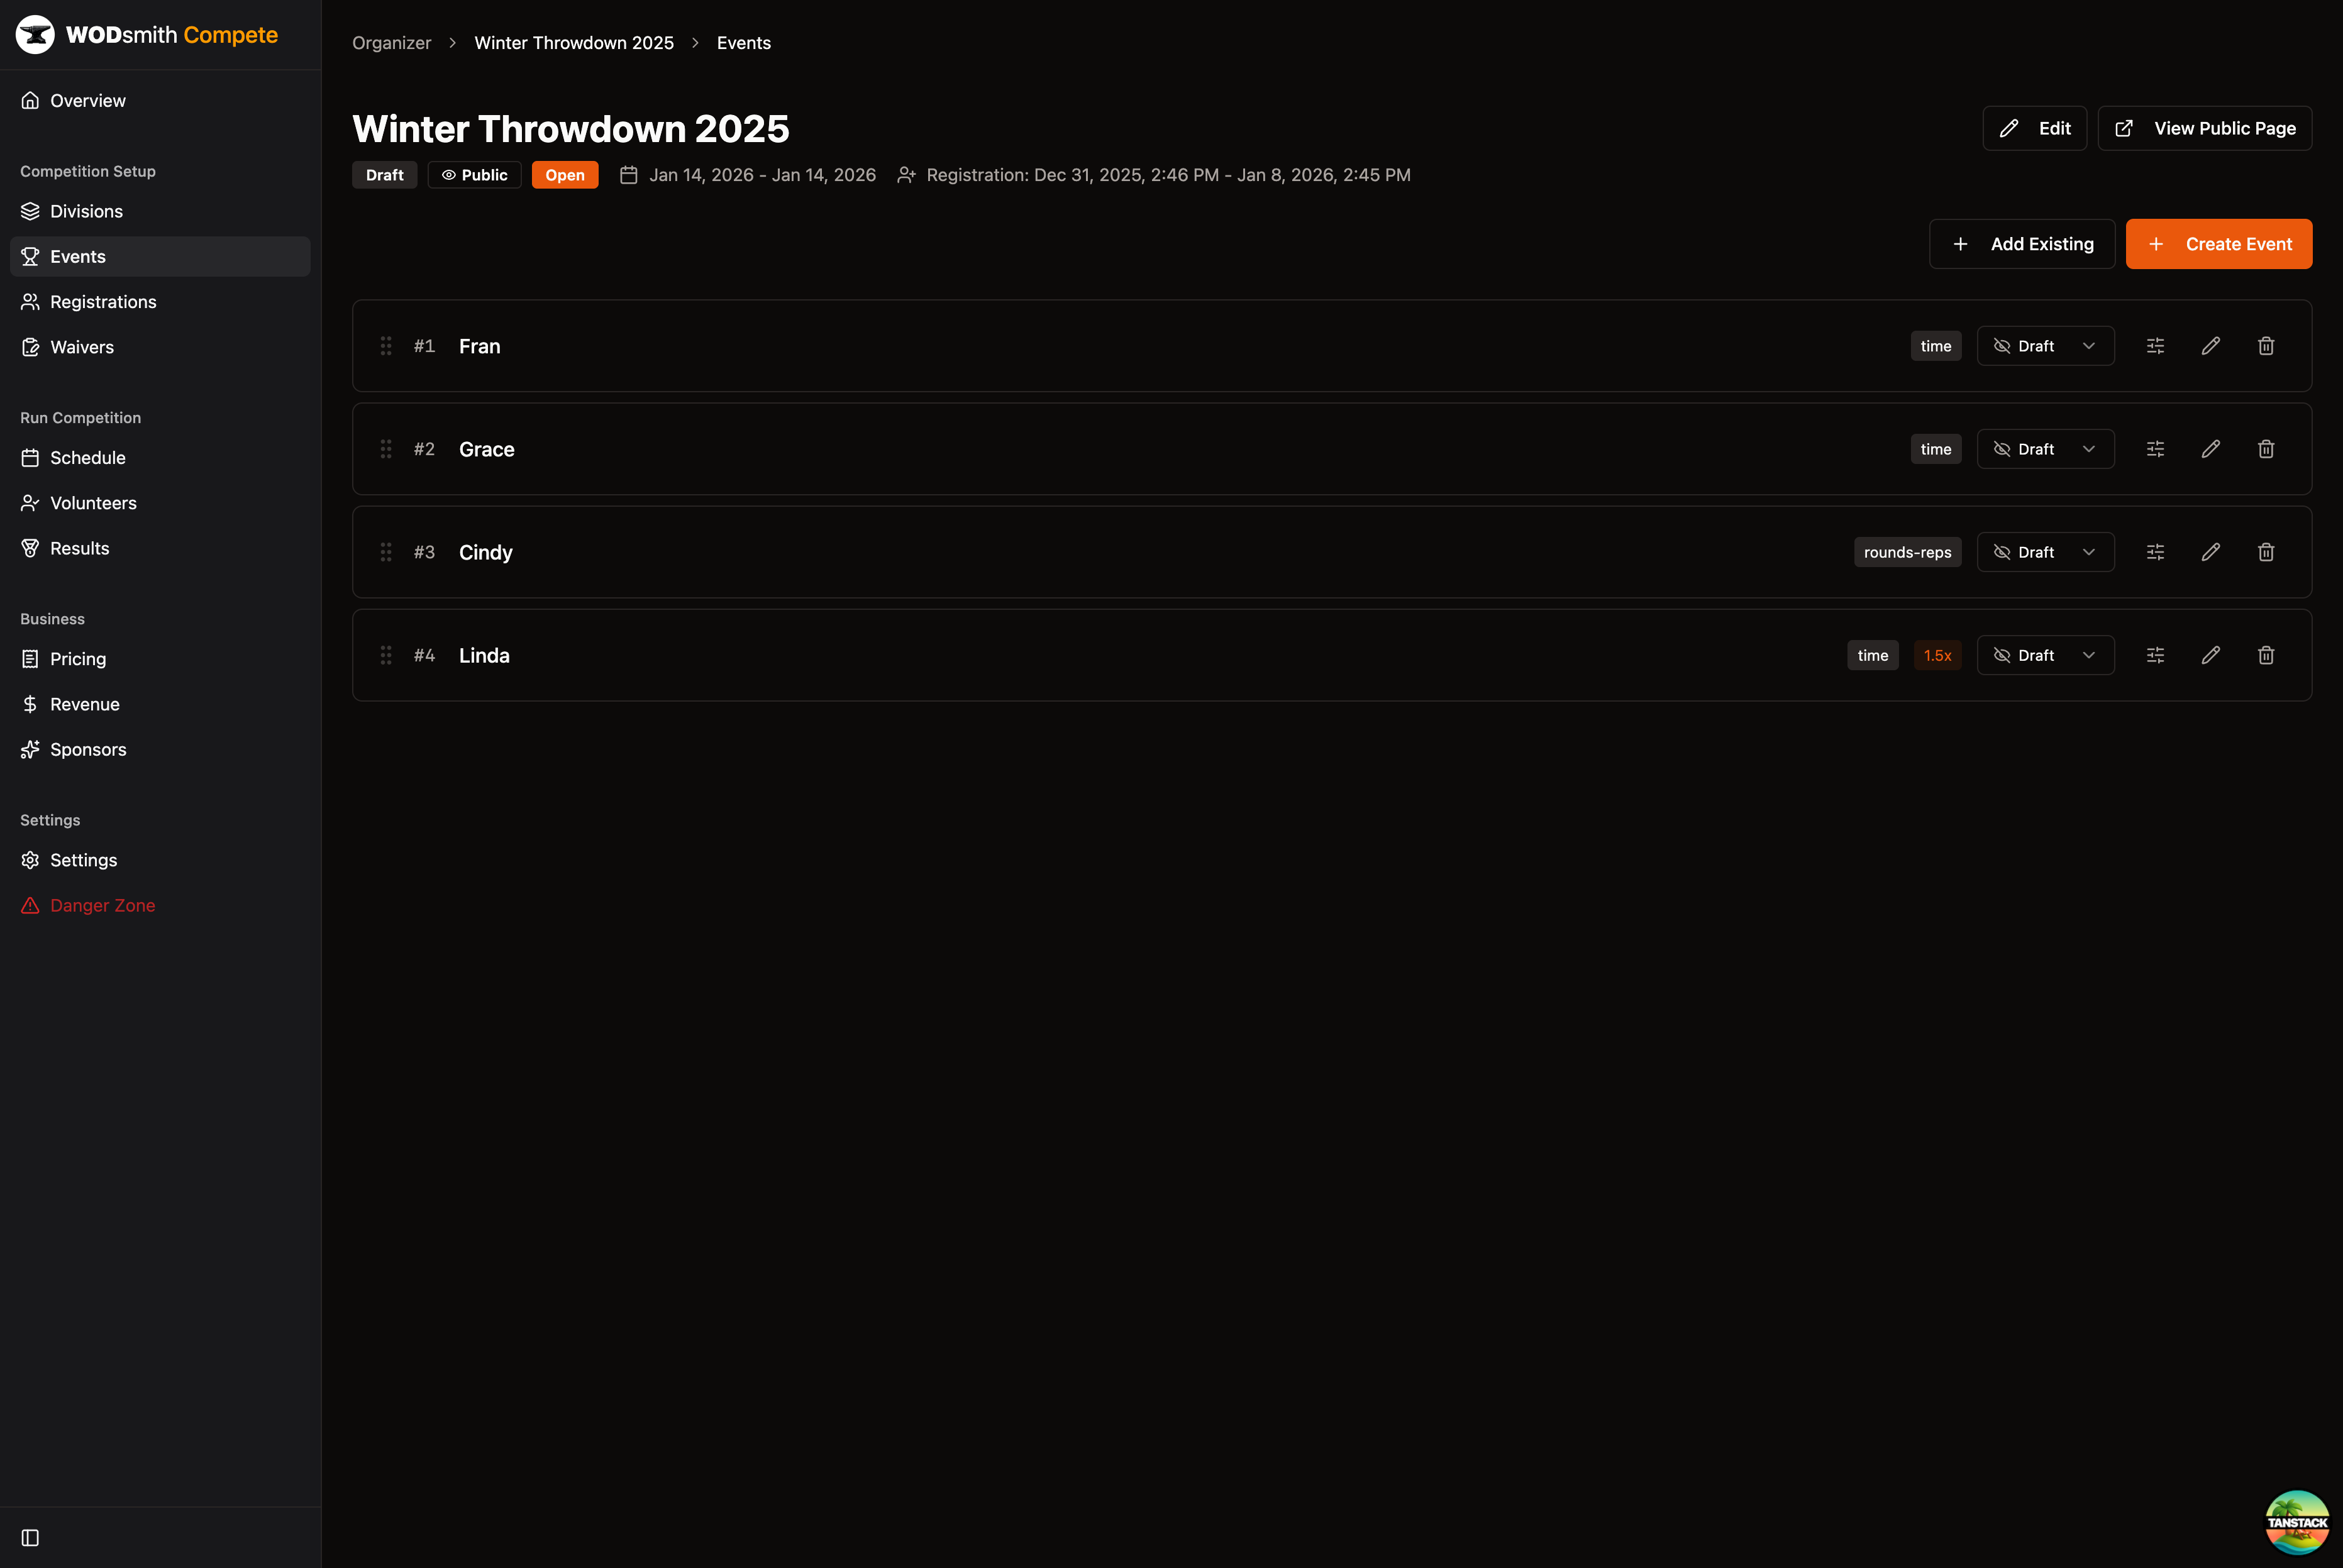
Step 3: Add Competition Events
Now we'll add the workouts athletes will compete in.
- Click Events in the left sidebar
- Click Create Event (or Add Existing to use a workout from your library)
- In the Create Event dialog:
- Enter the Event Name (e.g., "Event 1 - Fran")
- Select the Scheme (For Time, AMRAP, etc.)
- Choose the Score Type
- Optionally add Movements from the available list
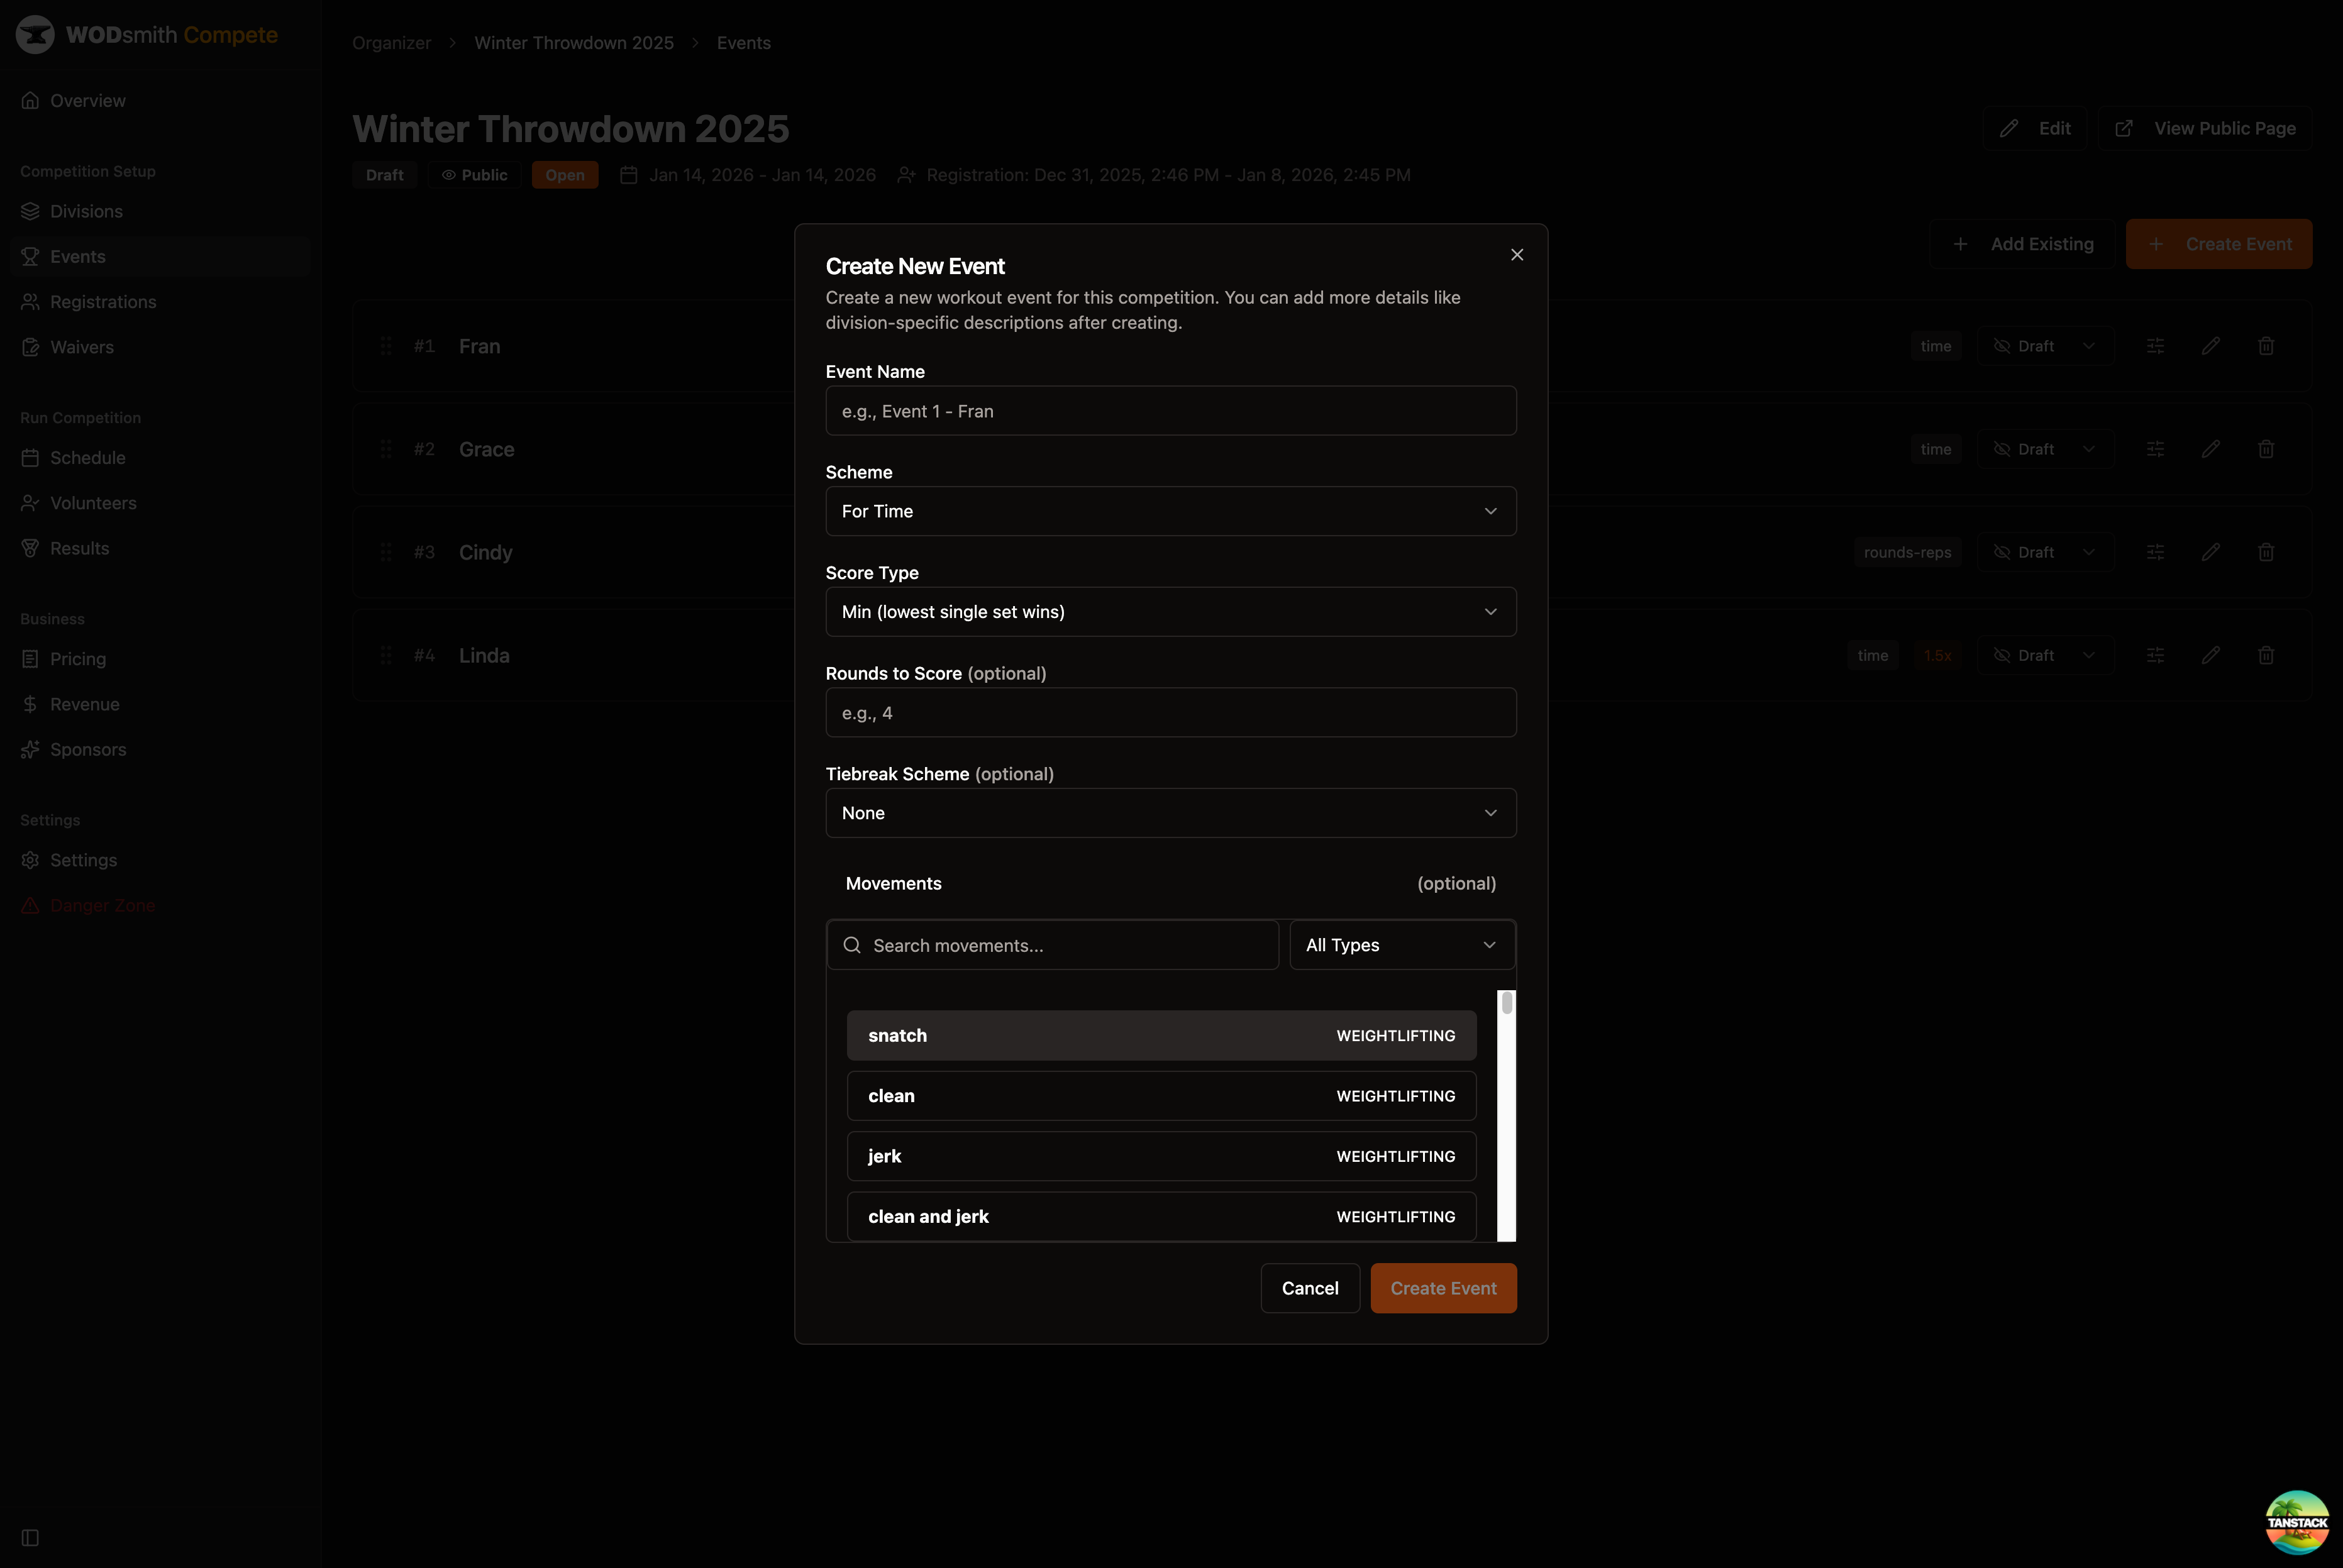
- Click Create Event
You should see the event appear in your events list.
Add More Events
Repeat the process to add additional events. You can:
- Drag events to reorder them
- Set event status (Draft, Published)
- Add scoring multipliers for specific events
Step 4: Set Up Pricing
Configure registration fees for your competition.
- Click Pricing in the left sidebar under "Business"
- If you haven't connected Stripe, you'll see a prompt to set up payouts
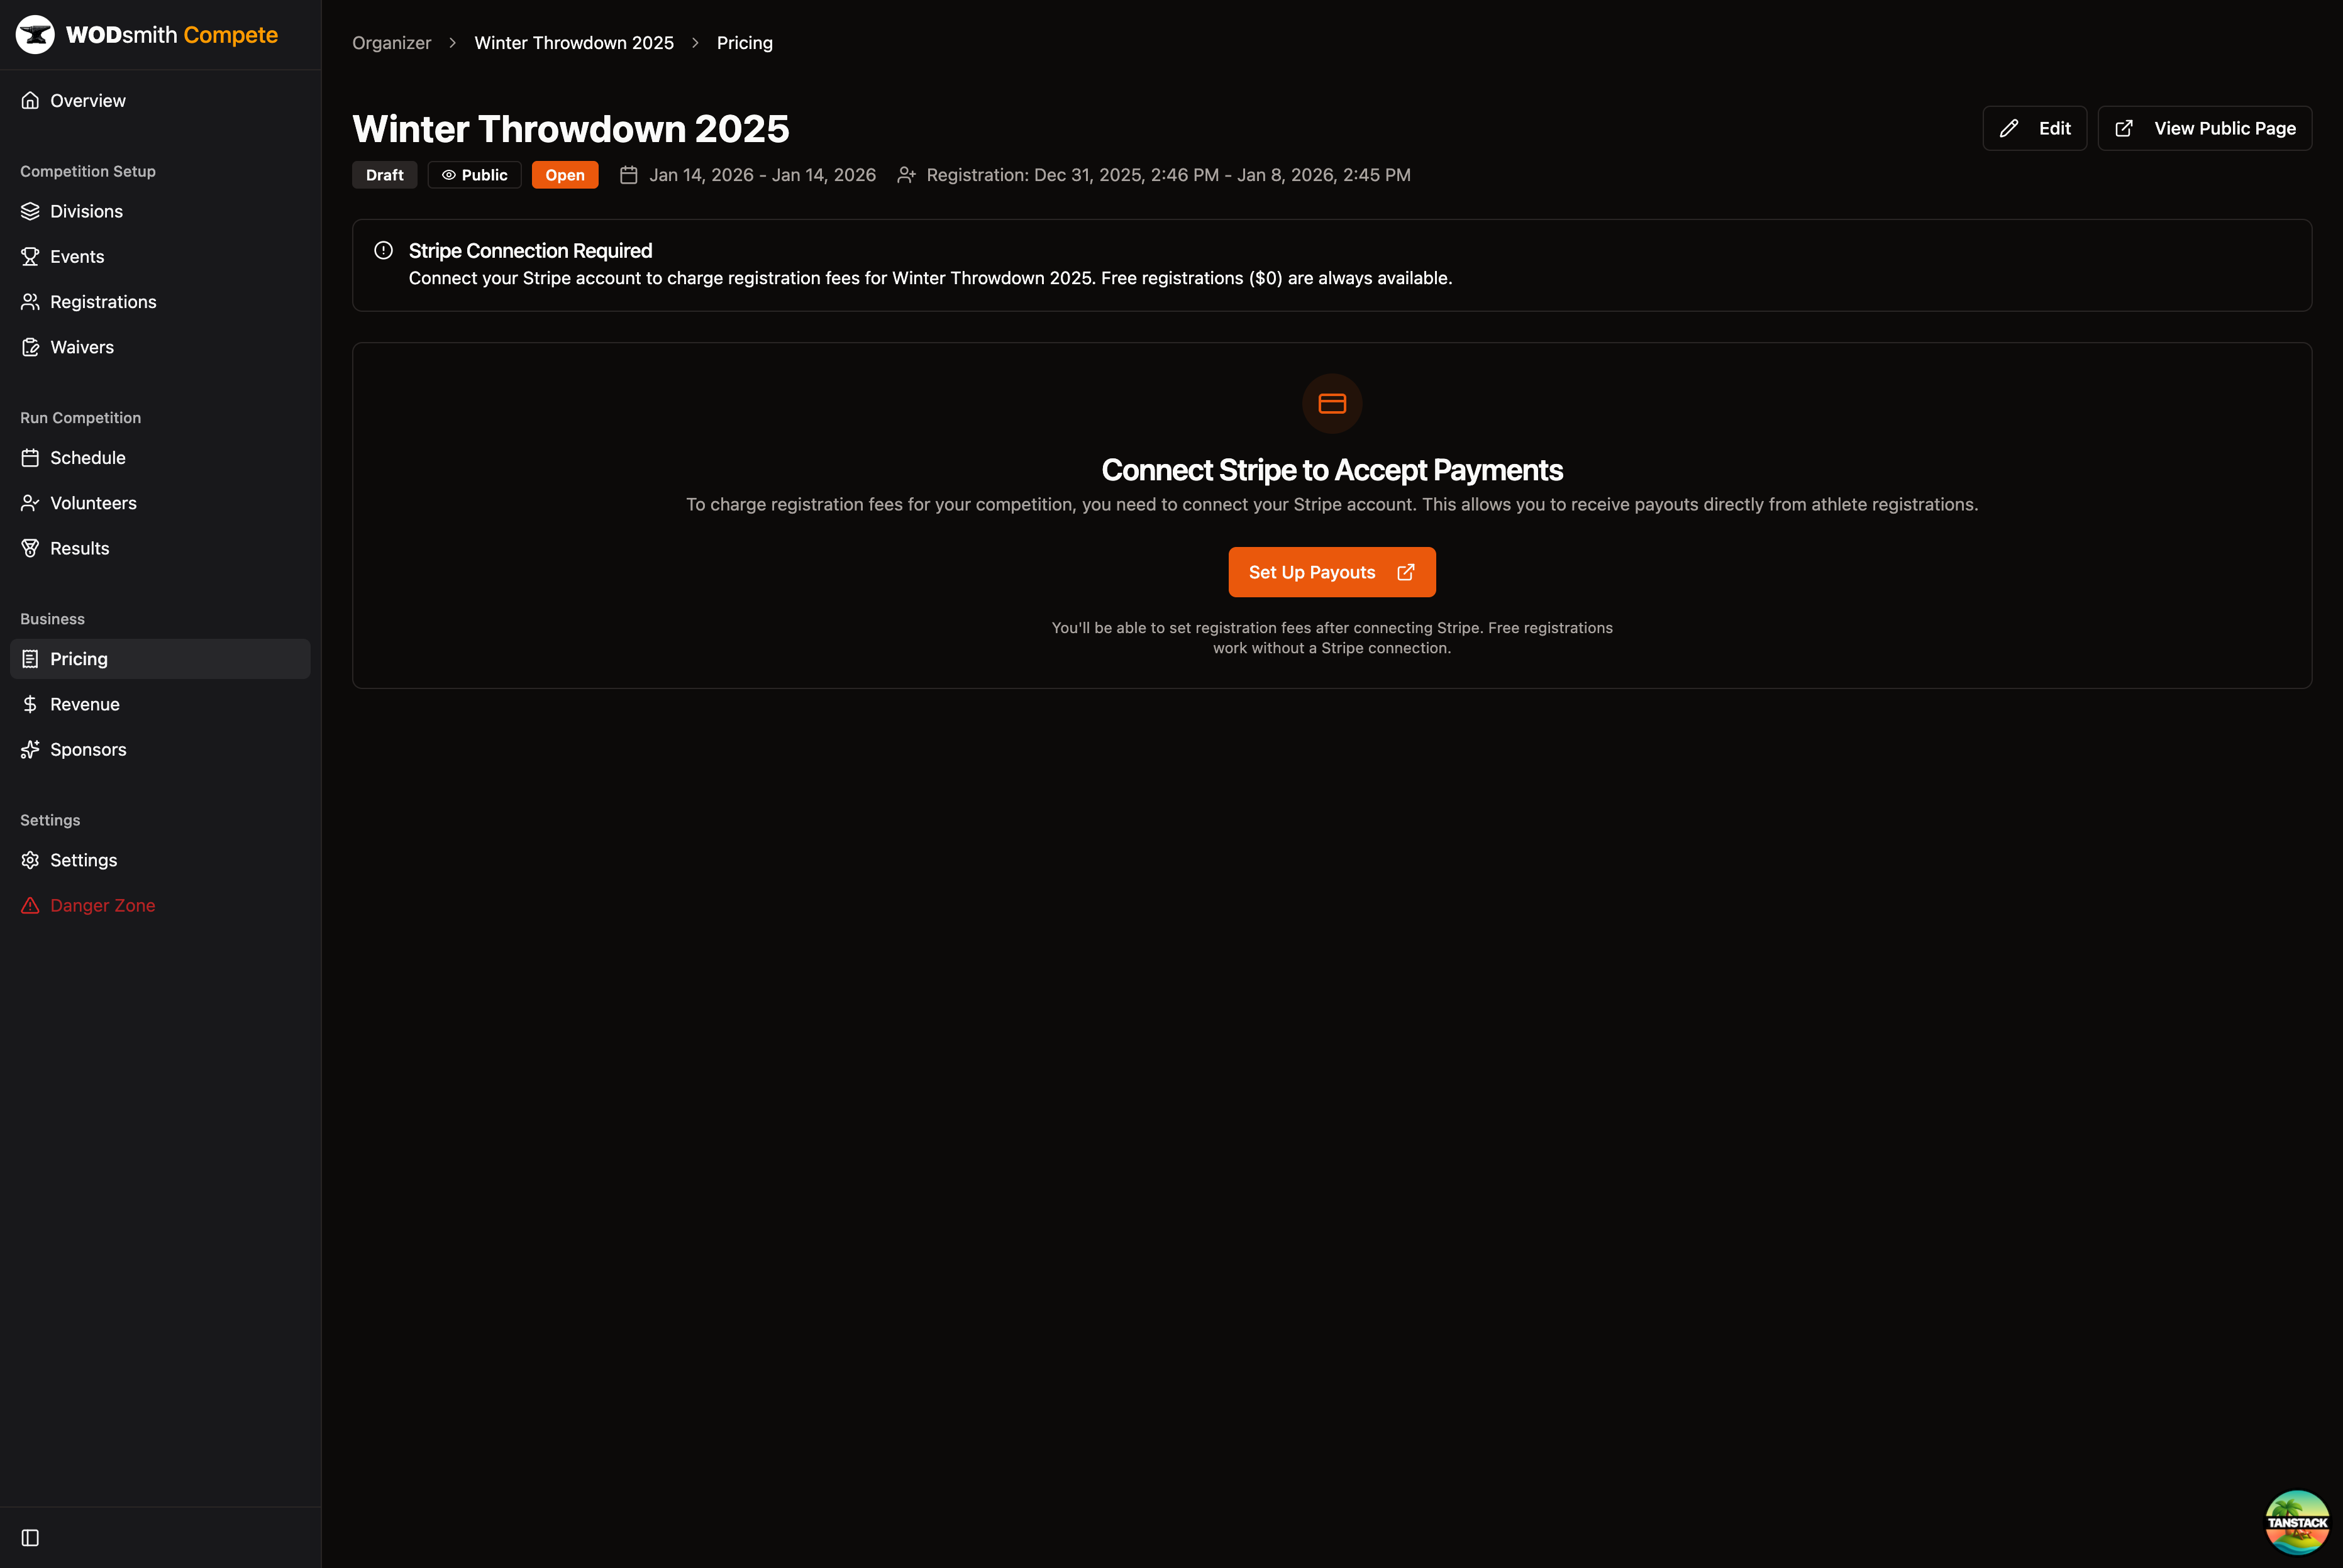
- Click Set Up Payouts to connect your Stripe account
- Once connected, you can set registration fees per division
Note: Free registrations ($0) work without a Stripe connection.
Step 5: Publish Your Competition
We're ready to make the competition visible to athletes!
- Click Edit in the competition header (or navigate to the Edit page)
- Scroll down to find the Status dropdown
- Change Status from "Draft" to "Published"
- Set Visibility to "Public" if you want the competition listed on the public events page
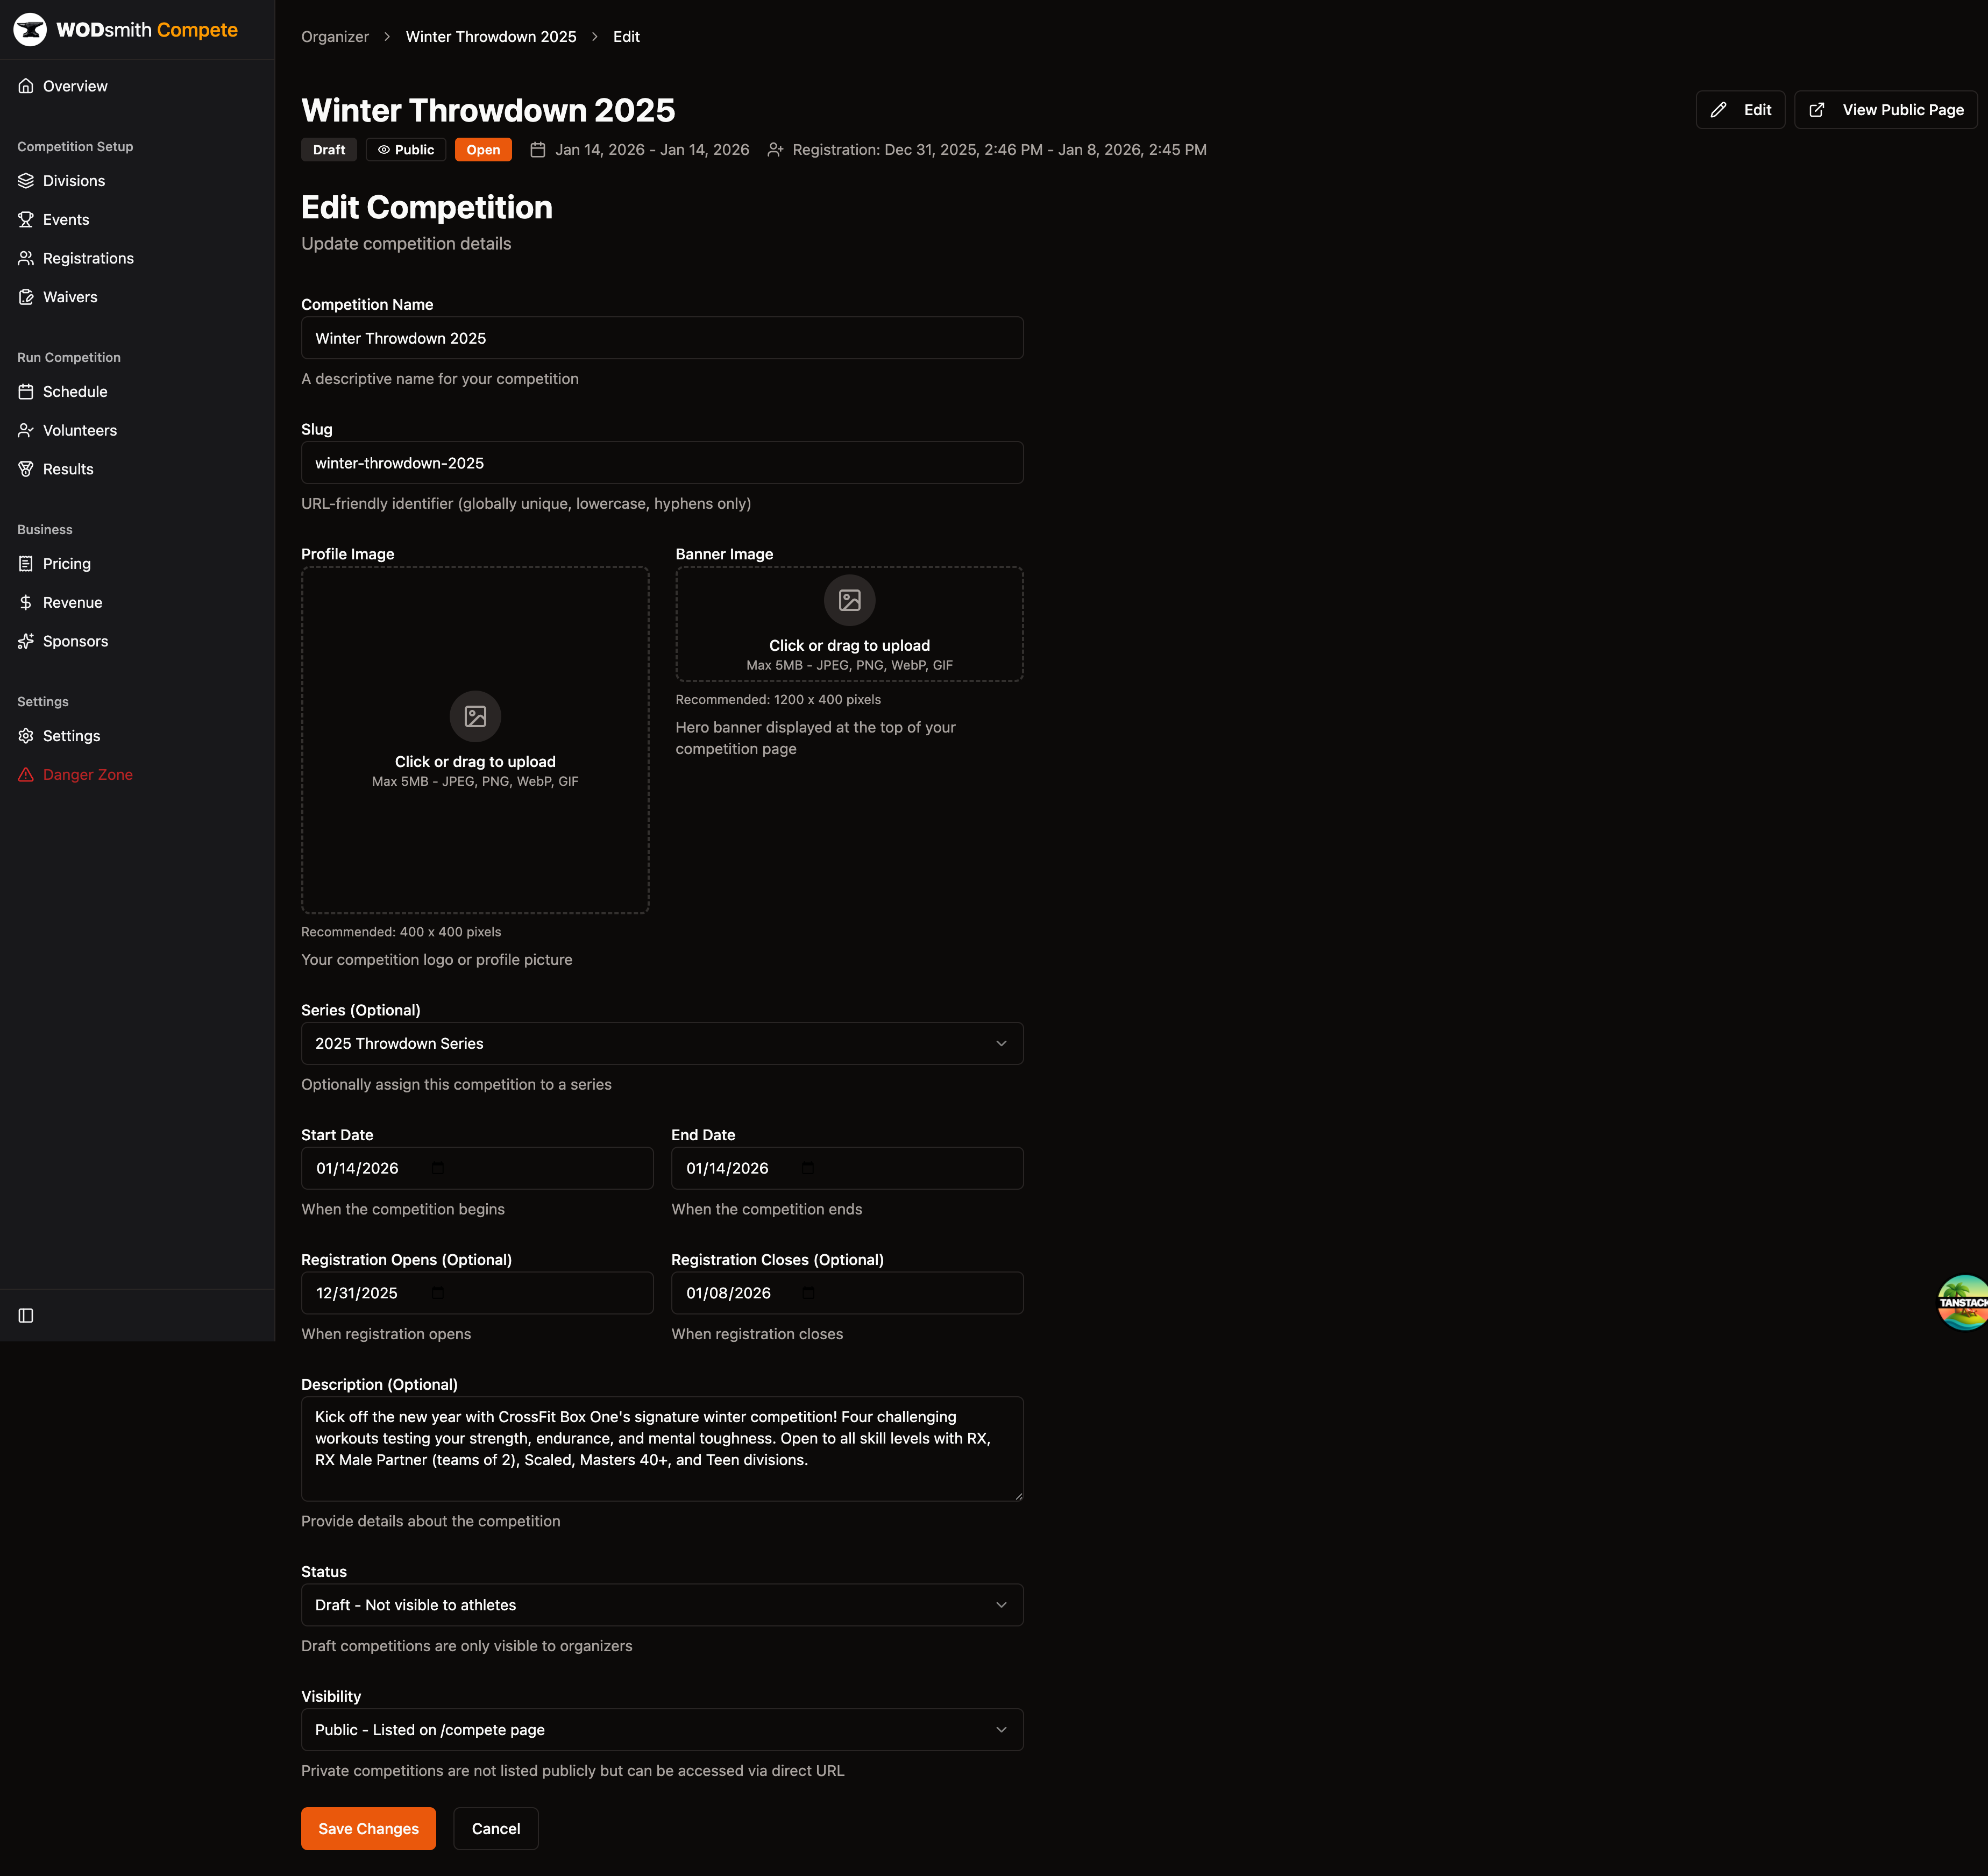
- Click Save Changes
You should see the status badges update in the header.
Step 6: Share Your Competition
Your competition is now live! Let's get the registration link.
- Click View Public Page in the competition header
- On the public page, click Share to copy the link
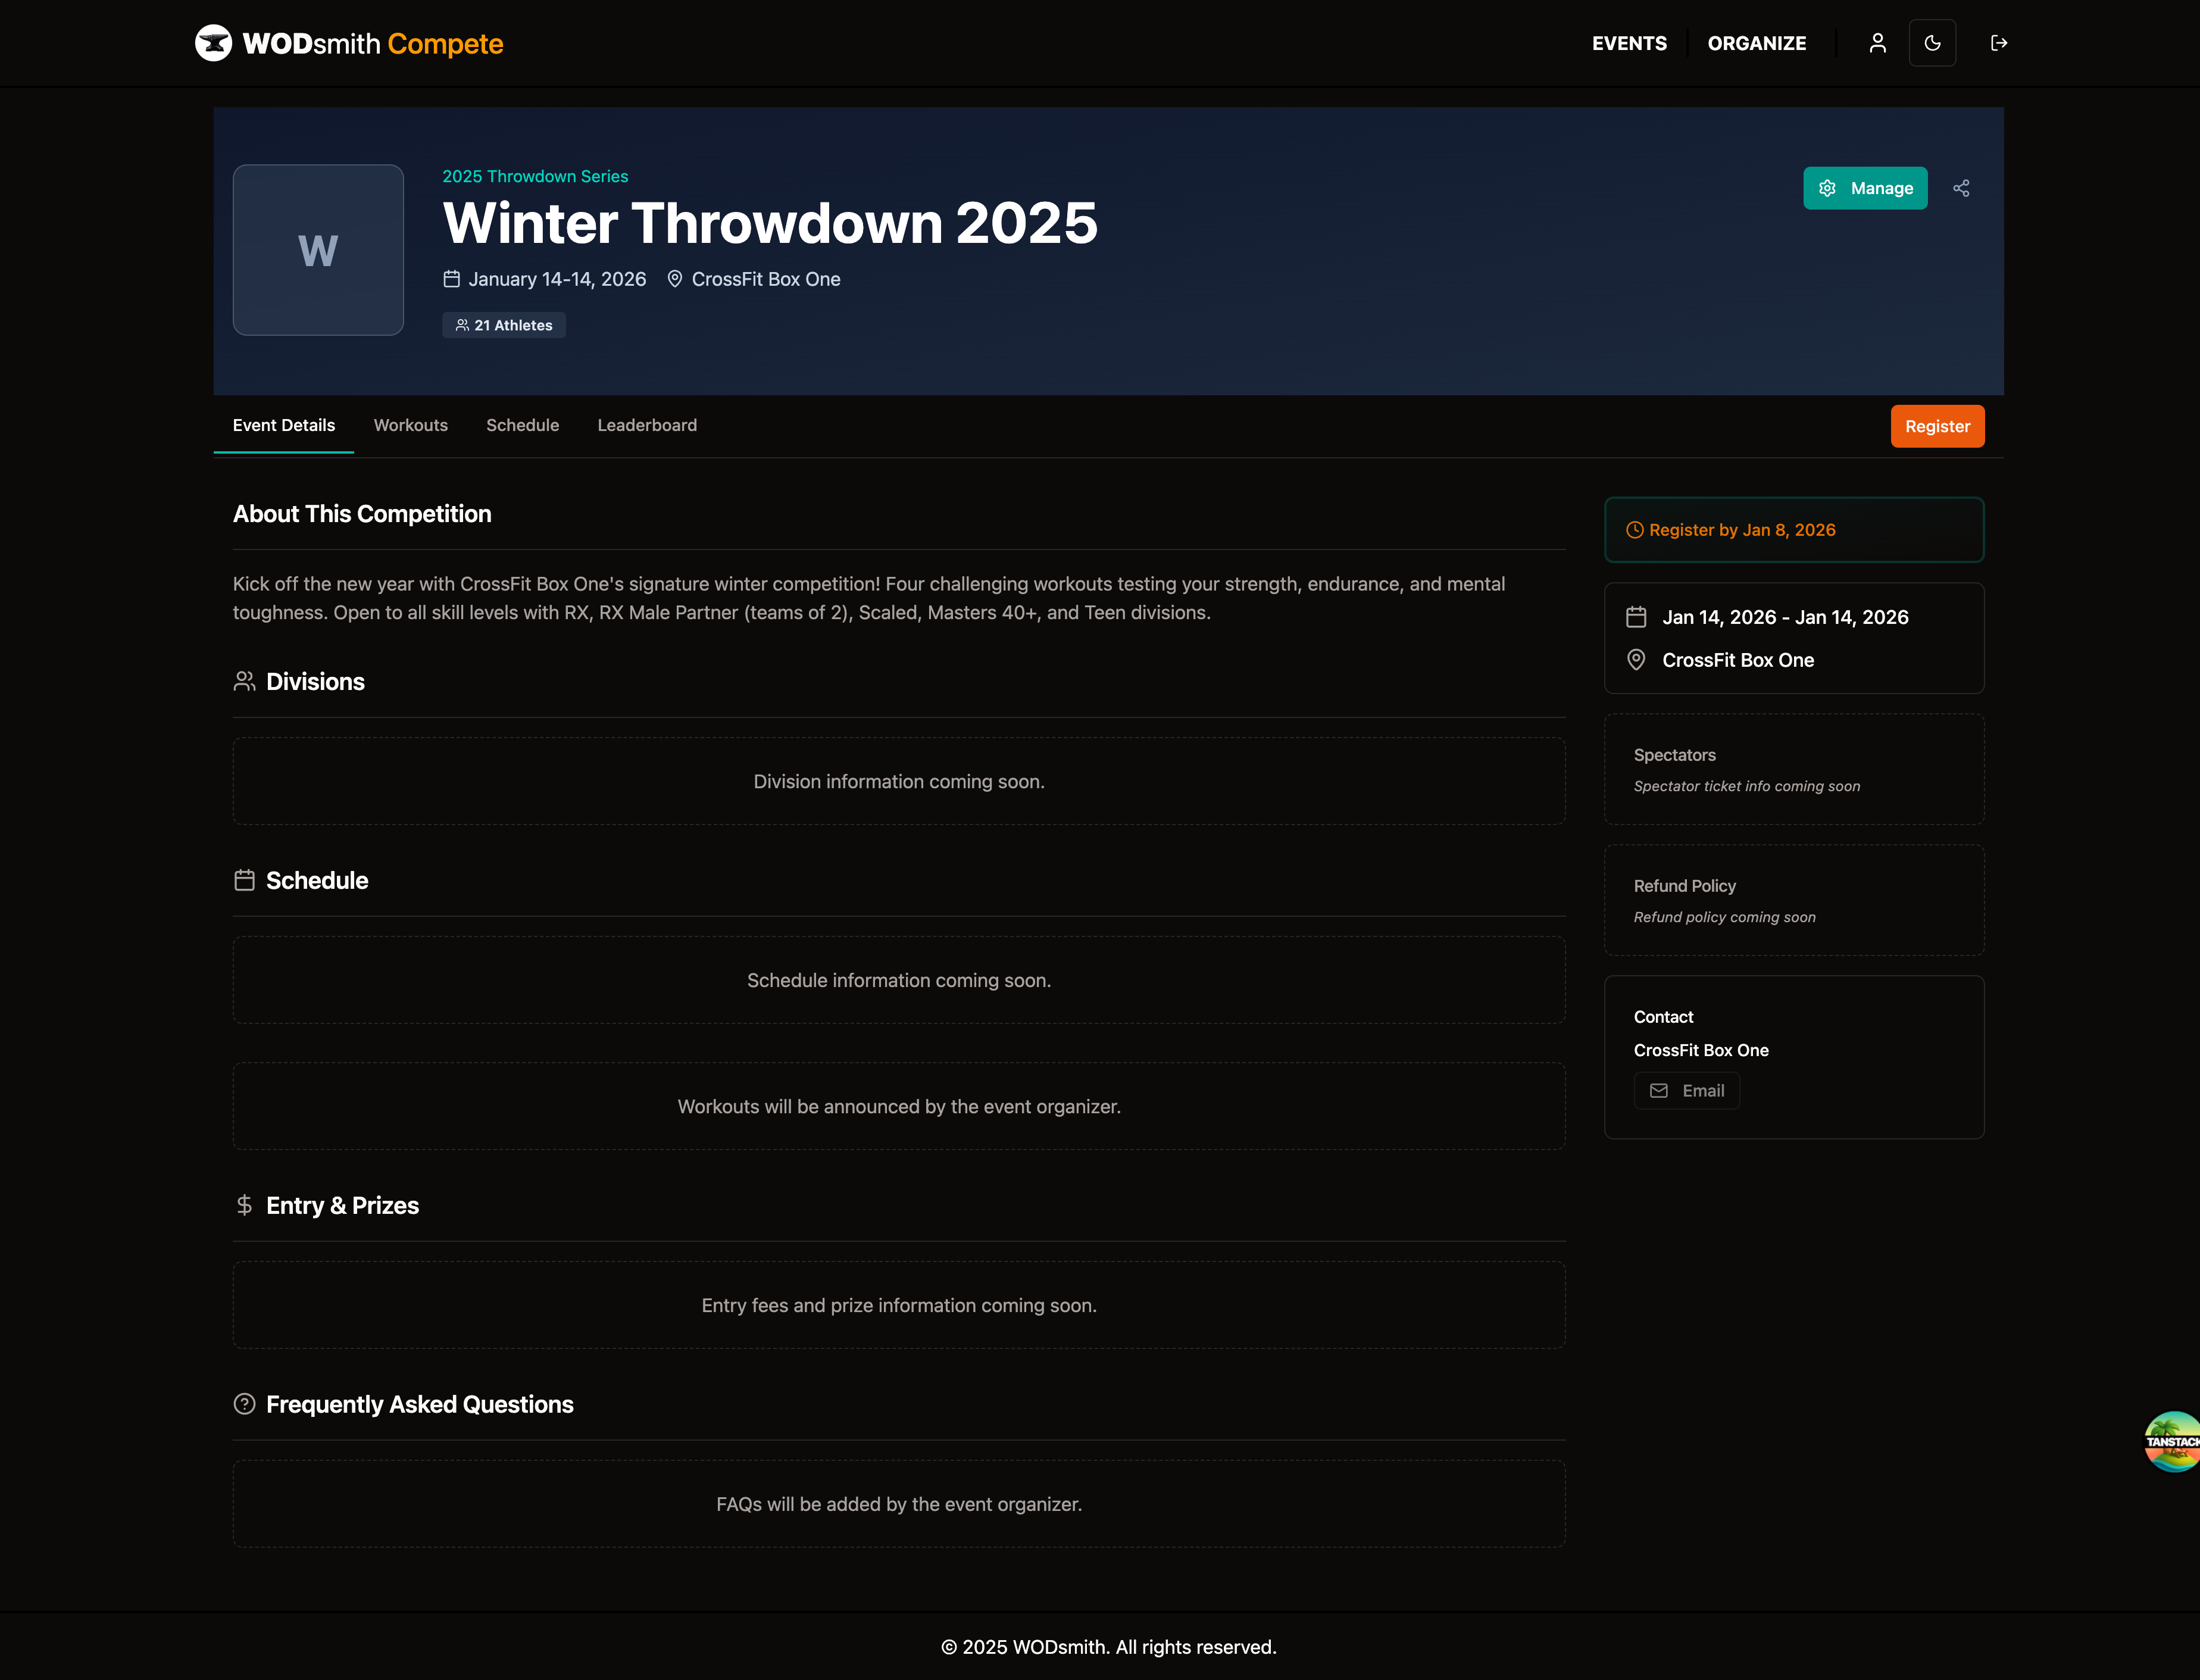
Notice the URL format: yourdomain.com/compete/your-competition-slug
This is the link you'll share with athletes to register.
You've Done It!
Congratulations! You have successfully created a competition with:
- Divisions configured for different skill levels
- Workout events ready for competition day
- Registration open for athletes
What's Next
As registrations come in:
- Manage registrations - View and manage athlete signups
- Schedule heats - Organize athlete heat times
- Run event day - Scoring, leaderboards, results
Need to modify your competition? Click Edit from your competition dashboard to update any settings.