How to Manage Registrations
View, filter, and edit athlete registrations for your competition.
Prerequisites
- Competition organizer permissions on the organizing team (or admin role)
- Competition with at least one division configured
Viewing Registrations
- Open your competition from the Organize dashboard.
- Click Registrations in the sidebar.
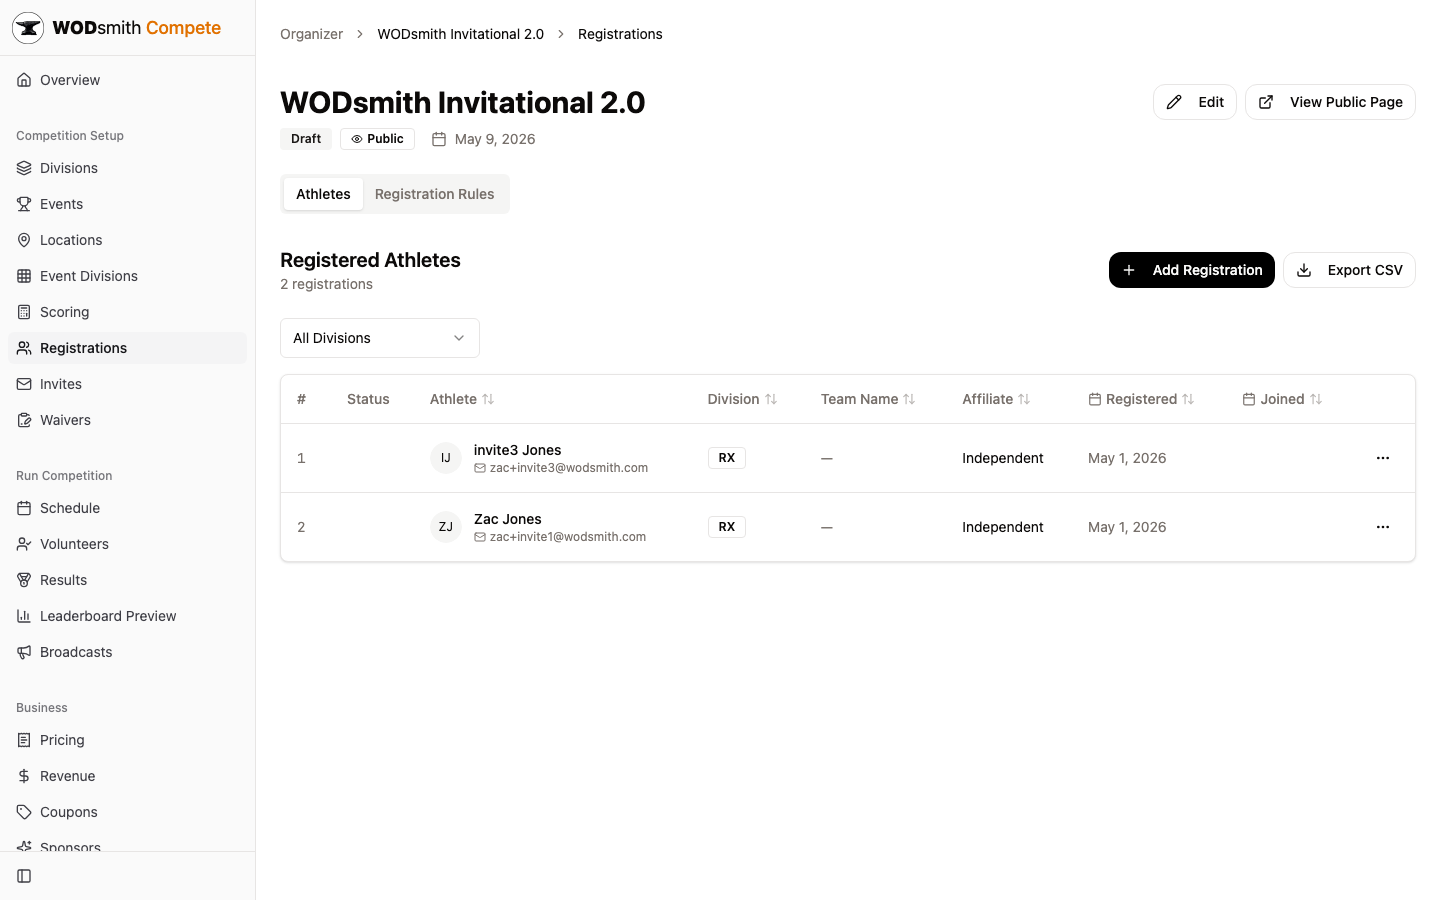
The table shows every registered athlete with sortable columns:
| Column | What's there |
|---|---|
| # | Row number |
| Status | Registration status (e.g., Active, Removed) |
| Athlete | Name and email — captain only for team registrations |
| Division | The division they registered for |
| Team Name | Team registration name (— for solos) |
| Affiliate | Their gym; appears as subtext on the public leaderboard |
| Registered | Registration date |
| Joined | When they accepted (different from Registered for invited teammates) |
The ... menu on each row opens captain-scoped actions: View Details, Change Division, Transfer Registration, Remove.
Filtering by Division
Use the All Divisions dropdown to scope the table to a specific division. The dropdown labels include counts (e.g., RX (10)).
Athlete Detail Page
Click View Details on any row to open the per-athlete page at /compete/organizer/{competitionId}/athletes/{registrationId}. This is the surface for any per-registration edit:
- Inline edit of team name, affiliate (per-member for team registrations)
- Roster management — invite teammates, resend invites, remove non-captain members
- Per-question answer edit for active members and pending invites
- Read-only waiver list with signature status (waivers are legal records and never editable)
- Per-event score entry with the same rounds + tiebreak + status controls athletes use
- Video submission management (online competitions)
For pending teammate invites, you can also pre-fill answers and affiliate before they accept — those values transfer onto their registration on acceptance.
Adding a Manual Registration
The Add Registration button opens the manual registration dialog. Use this when:
- An athlete pays you directly (cash, check, comp ticket) and you want to add them to the system
- You're testing the flow before going public
- An athlete loses access to their email and can't accept an invite
The dialog accepts an email — if a user with that email already exists, they're added as a normal registration. If not, WODsmith creates a placeholder user and emails a claim link so the athlete can finish setting up their account.
Transferring a Registration
Two transfer types:
- Change Division — same person, new division. Use Change Division in the row menu.
- Transfer Registration (Purchase Transfer) — different person inheriting the slot (and waiver, answers, payment). Use Transfer Registration. The recipient gets an email with a claim link; until they accept, the transfer shows as Pending.
Both actions preserve the slot count — the transfer doesn't open a new spot for waitlist purposes.
Removing a Registration
The Remove action soft-deletes the registration. Removing cascades:
- Drops the athlete from heat assignments
- Removes their pending teammate invites
- Voids any per-event scores in that division
- Emails the captain (and Stripe-refunds the purchase if the organizer chose that option)
Removed registrations are still visible in the list with status Removed for audit purposes.
Exporting
Click Export CSV to download all registrations including custom question answers. Useful for:
- Heat assignment spreadsheets
- T-shirt size tallies
- Insurance / waiver audit trails
See also: How to Create Registration Questions | How to Schedule Heats | How to Run Event Day